
The following controls have been added to CyberStore in this version:
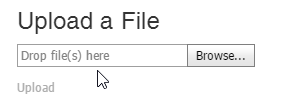
This new control allows you to upload a file to CyberStore when you are signed in. In order to use this feature, ensure that the IIS user has the ability to make changes to the ~/Site folder and ../temp folder.
An example of this feature, if you upload Customer number 0000002 to a folder in /Site/Uploads, CyberStore will save it as ~/Site/Uploads/0000002/*.* .

You can use this property to limit available file extensions to those that you specify in a comma delimited list via the AllowedFileExtensions property.
The CharacteristicValueDisplayControl allows you to retrieve a URL-type Characteristic from any Characteristic Family. You can then display the URL as either a button that will open the URL in a window or as an inline image.
To utilize the control, you must have a value for the specified Characteristic.
The control can work with any object-type Characteristic Family including Account, Item, Category, Customer, Customer Class, and View List. In order to retrieve the proper ID, specify one of the following properties: Account_ID, Category_ID, ViewList_ID, Customer_ID, CustomerClass_ID, or Item_ID. Otherwise, CyberStore uses the current session and page details to attempt to retrieve it automatically based on the object-type specified in the Characteristic Family definition.
See the example below of a URL-type Characteristic displayed as an inline image:
| SitePages.config |
Copy Code
|
|---|---|
<Control src="CharacteristicValueDisplayControl.ascx" Name="CharacteristicValueDisplay" CharacteristicPath="Family/Characteristic Name" UrlDisplayMode="Image" Width="100" Height="100" CharacteristicDisplayCSSClass="SomeClassName" /> |
|
See the example below of a URL-type Characteristic displayed as a button:
| SitePages.config |
Copy Code
|
|---|---|
<Control src="CharacteristicValueDisplayControl.ascx" Name="CharacteristicValueDisplay" CharacteristicPath="Family/Characteristic Name" UrlDisplayMode="Link" ButtonText="[Label]" LinkWindowName="WindowName" CharacteristicDisplayCSSClass="SomeClassName" /> |
|
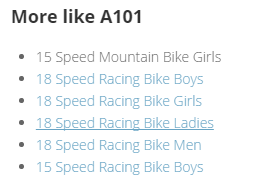
Use the CatalogItemTextLinkListControl to create a list of Items based on a Category. This list can serve as an additional navigational device by presenting links to the "Item Detail" pages of sibling Items.
Unless you specify otherwise in the Category_ID property, the control references the Session["LastCategory_ID"] variable to identify the appropriate Category. If one does not exist, the control will default to the first Category linked to that Item in the current View List.

To set the preferred format in which you would like your list to appear, use the DisplayMode property. You can choose from a BulletList (default), OrderedList, or LinkList.
Use the ItemLinkText and HeadlineText properties to set the Item text and Headline text. You can include any of the following replacement tags in these properties:
| Replacement Tag | |
|---|---|
| [Item_Name] | The Name (SYSPRO Description) of the Item. |
| [Item_StockCode] | The Stock Code of the Item. |
| [Item_Headline] | The CyberStore Headline of the Item. |
| [Item_SubHeadline] | The CyberStore Sub Headline of the Item. |
| [Item_ShortDescription] | The CyberStore Short Description of the Item. |
| [Item_LongDescription2] | The Long Description 2 (SYSPRO Long Description) of the Item. |
By default, when you are on an "Item Detail" page for a particular Item, that Item will appear within the list as text-only rather than linked. To hide the active Item, set the ShowActiveItem property to "false."
See an example of this control in use below:
| SitePages.config |
Copy Code
|
|---|---|
<Control src="CatalogItemTextLinkListControl.ascx" Name="ItemList" DisplayMode="BulletList" ItemLinkText="[Item_Name]" WrapperCSSClass="ItemTextListWrapper" ItemCSSClass="ItemTextListItem" LinkCSSClass="ItemTextListLink" ShowActiveItem="true" ActiveItemCSSClass="active" HeadlineText="More like [Item_StockCode]" HeadlineTextCSSClass="ItemTextListHeadline" /> |
|