
The "Item Image Maintenance" screen allows you to maintain the images associated with a particular Item.
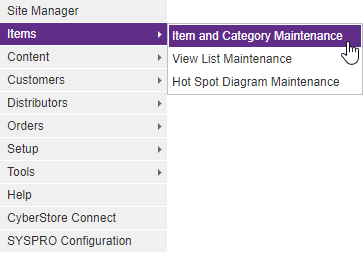
To access this screen, go to Items > Item and Category Maintenance.

In the "Item Maintenance" grid, locate the row designated for the Item that has images you want to edit. Select the corresponding Edit button under the "Item Images" column.
When the application has loaded, the following screen appears.
This screen contains the following sections:
| Item Image Maintenance Information | |
|---|---|
| Photo 1 |
The featured Photo 1 is typically used for samller, thumbnail presentation like those used in listings or search results. To choose an image, click Browse... and select your desired image. Then click Upload to finalize your choice. You should then see a preview of this image within the tab. Details about the filename, file type, file size, and image dimensions should also appear. If you already have a image uploaded but would like to change it, first click Remove before proceeding to add a new one. For best results, upload an image that has a file size smaller than 75K. |
| Photo 2 |
The featured Photo 2 is typically used as a larger, higher-quality version of Photo 1 that may be used on Item Detail pages. To choose an image, click Browse... and select your desired image. Then click Upload to finalize your choice. You should then see a preview of this image within the tab. Details about the filename, file type, file size, and image dimensions should also appear. If you already have a image uploaded but would like to change it, first click Remove before proceeding to add a new one. For best results, upload an image that has a file size smaller than 75K. |
| Manage Item Detail Photos | A button that, when clicked, opens the "Image File Manager" that contains Item detail photos. |
When you click Manage Item Detail Photos, the "Image File Manager" pops up.
To upload an image, click Browse... and select your desired image. Then click Upload to finalize your choice. You should then see a preview of this image within the tab. Details about the filename, file type, file size, and image dimensions should also appear.
You can also click and drag files from a file folder on your desktop. Simply click on your desired files and drag them into the main window of the "Image File Manager." When you unclick the files, the system uploads them one by one.
Item images are rendered on the front end using the CatalogItemImageControl which is included as a sub control in the following controls:
Implementation Note:
When passing the EnableZoom property as true to any of the controls listed above, the CatalogItemImageControl automatically creates thumbnail and detail sizes of any Item detail images. Be sure to upload a photo of a high enough quality for a zoomed-in version of the image.
When no Item detail images are present, or EnableZoom is passed as false, then the featured photo designated by the UsePhoto property is used. Finally, if no featured item photo is present, a category photo can be used when FallbackToCategoryPhoto property is set to true.