
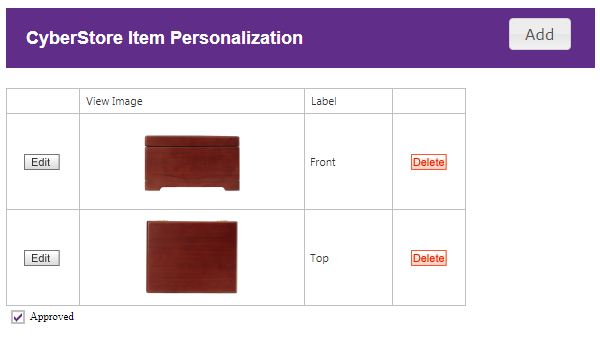
The "Item Personalization Maintenance" grid allows you to create customizable features on certain Items for shoppers to be able to use and personalize to their liking.
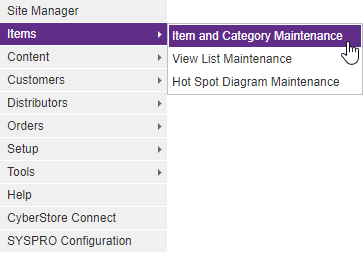
To access this grid, go to Items > Item and Category Maintenance.
In the "Item Maintenance" grid, locate the row designated for the Item whose Item personalization features you want to edit. Select the corresponding Edit button under the "Personalization" column.
When the application has loaded, the "Item Personalization Maintenance" grid appears.
When you click Edit or Add, the "Item Personalization" pop-up appears. This pop-up contains the following tabs:
General View Settings View Areas
Use these tabs to maintain the key elements of the personalized features of an Item.
Use the General tab to maintain general personalized Item information and to configure options.
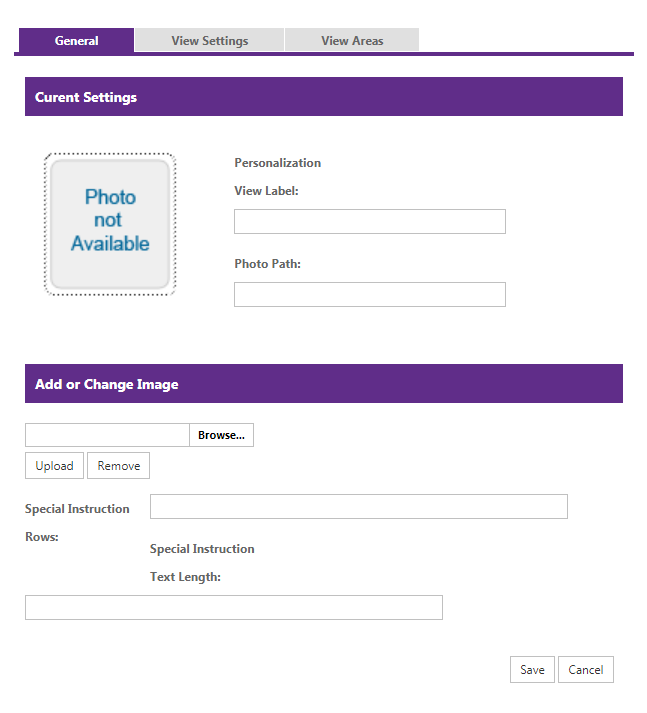
The General tab contains the following sections:
| General Information | |
|---|---|
| Current Settings | The view label is where you identify what view the picture is showing to specify where on the Item this particular personalization is taking place. The photo path is the location in which the image is located. |
| Add or Change Image |
To choose an image, click Browse... and select your desired image. Then click Upload to finalize your choice. You should then see a preview of this image within the tab. Details about the filename, file type, file size, and image dimensions should also appear. If you already have an image uploaded but would like to change it, first click Remove before proceeding to add a new one. Special Instruction Rows and Special Intruction Text Length lets you choose how many rows and words the customers are allowed to use to personalize the particular area of the Item. This limitation can help ensure the personalization comes out as best as possible. |
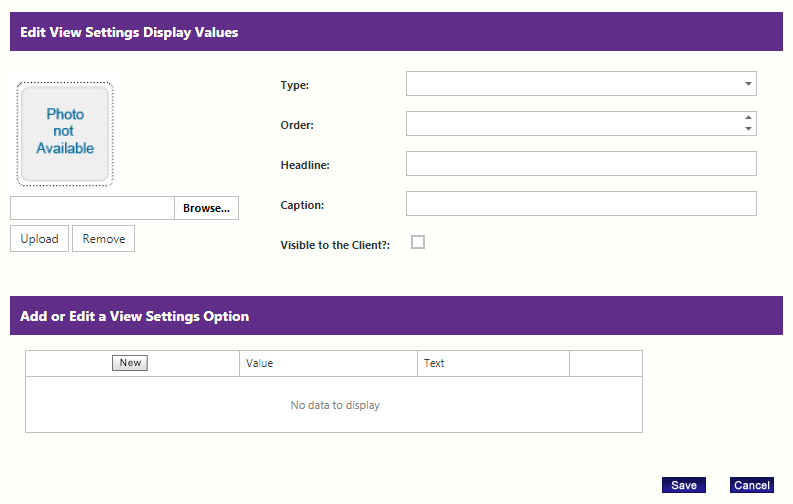
Use the View Settingstab to edit what the customer will see on the screen while personalizing an Item.

The View Settingstab contains the following sections:
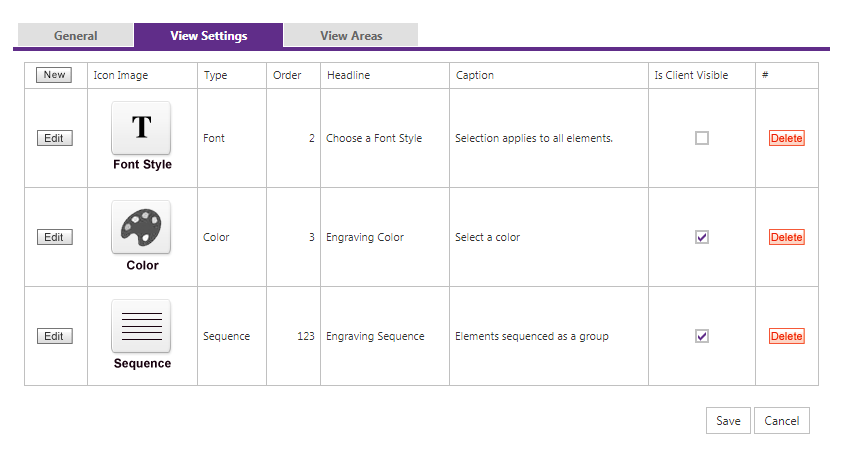
| View Settings Information | |
|---|---|
| Icon Image | The image in which you want the customer to view the particular setting. |
| Type | The type of setting it is. For example: Font Style, Color, or Sequence. |
| Order | The order of the item in display. |
| Headline |
What is written as the headline for the customer to read. For example: "Choose a Font Style" or "Engraving Color." |
| Caption | What is written as the caption, any specifications or explanation or directions that you want the customer to read which will be placed under the headline in smaller letters. For example: "Selection applies to all elements" or "Select a color." |
| Is Client Visible |
Whether the particular setting is visible for the client to edit. |
| # | This displays the Delete option, to delete the particular setting or not. |
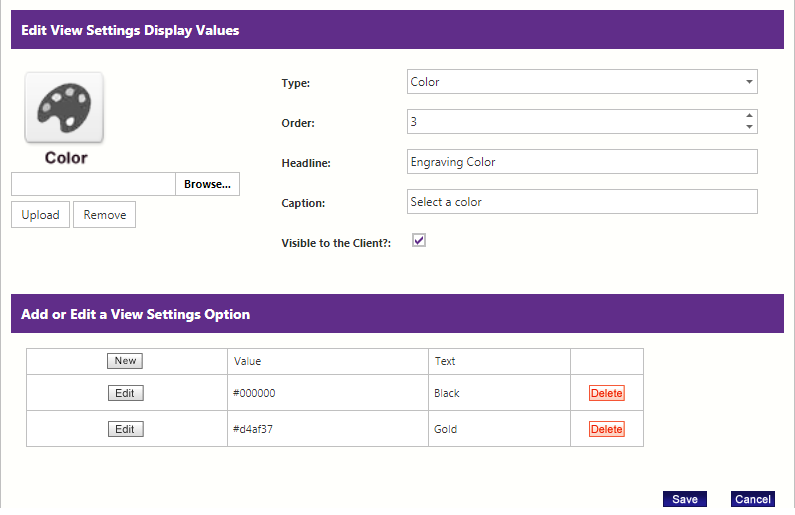
When you click New, you can edit your personalization settings within this tab. Here you have the options explained above in order to create a new setting. Once finished, press Save or if you decide to not add a new setting, pressCancel.
Once you have settings, for example the screen below, you can then press Editto change the settings whenever.
Use the View Areas tab to set the parameters to what area of image is editable for the customer to personalize.
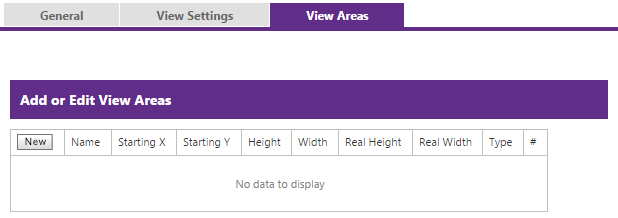
The View Areas tab contains the following sections:
| View Areas Information | |
|---|---|
| Name | Name of the editable area. |
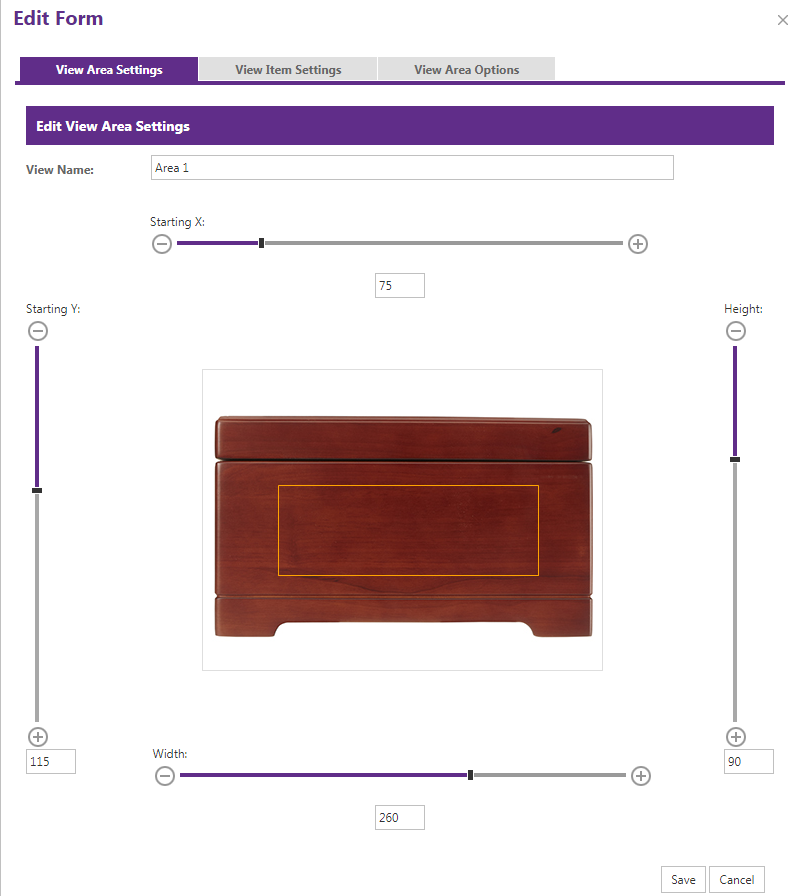
| Starting X | Where the editable area starts horizontally on the item. |
| Starting Y | Where the editable area starts vertically on the item. |
| Height |
The height of the editable area using the diagram. |
| Width | The width of the editable area using the diagram. |
| Real Height | The actual height of the editable area (not in terms of the diagram). |
| Real Width | The actual width of the editable area (not in terms of the diagram). |
| Type | Type of personalization. |
| # | Delete option. |
In terms of the diagram, below is an example. As you drag each measurement it will change the size of the editable area. This helps you visual the area on the item in which the customer will be able to personalize. Once you have created the right size, press Save.
