
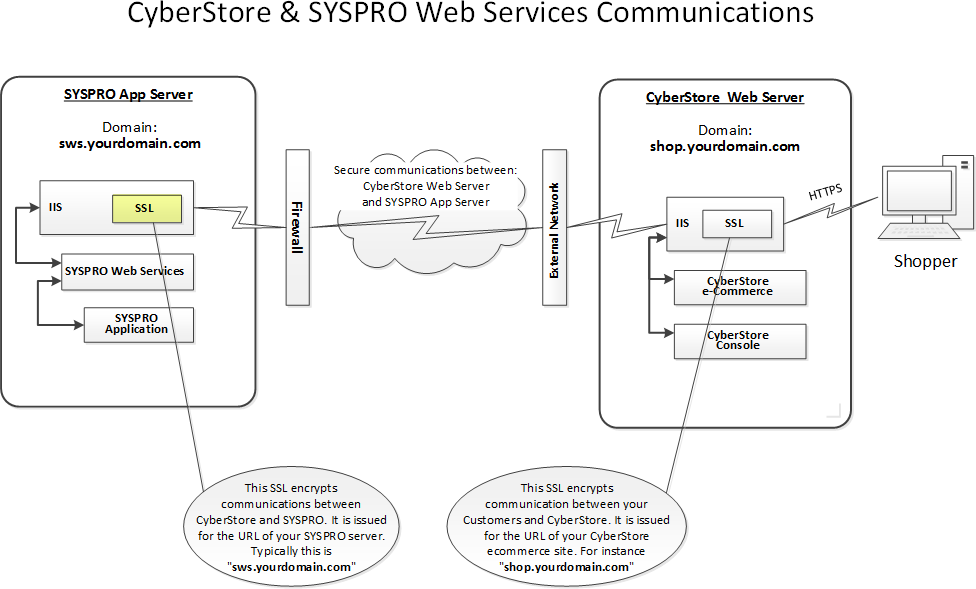
To ensure that all data is secure and encrypted, CyberStore only communicates with SYSPRO using web services via an HTTPS connection. To facilitate this, you must purchase and install an SSL certificate on the virtual website.
The diagram below helps to illustrate the role SSL certificates play in communications between CyberStore and SYSPRO Web Services.
Important:
The SSL certificate must exactly match the URL that CyberStore uses to communicate with SYSPRO. For example, if CyberStore communicates via https://sws.{yourDomain}.com:8081/SYSPROWebServices, the SSL certificate needs to be purchased for sws.{yourDomain}.com.
For assistance in selecting or purchasing an SSL certificate, check out the SSL Comparison Chart located on the CyberStore website at www.CyberStoreForSYSPRO.com/SSL-Comparison-Chart.
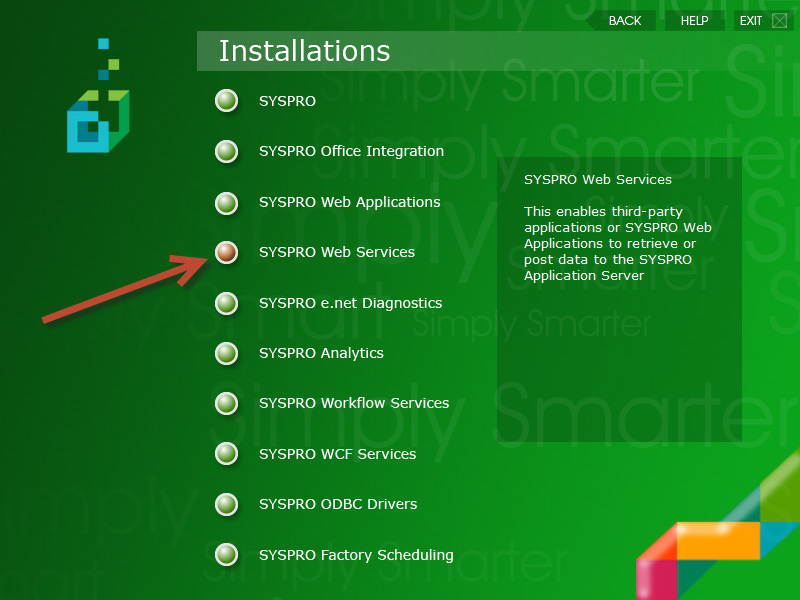
Insert the SYSPRO 6.1 DVD into your SYSPRO Application server. When the installer opens, choose “Installations." Then choose “SYSPRO Web Services.”
After the installation, go to your "Start" menu. Navigate to Administrative Tools > Internet Information Services (IIS) Manager.
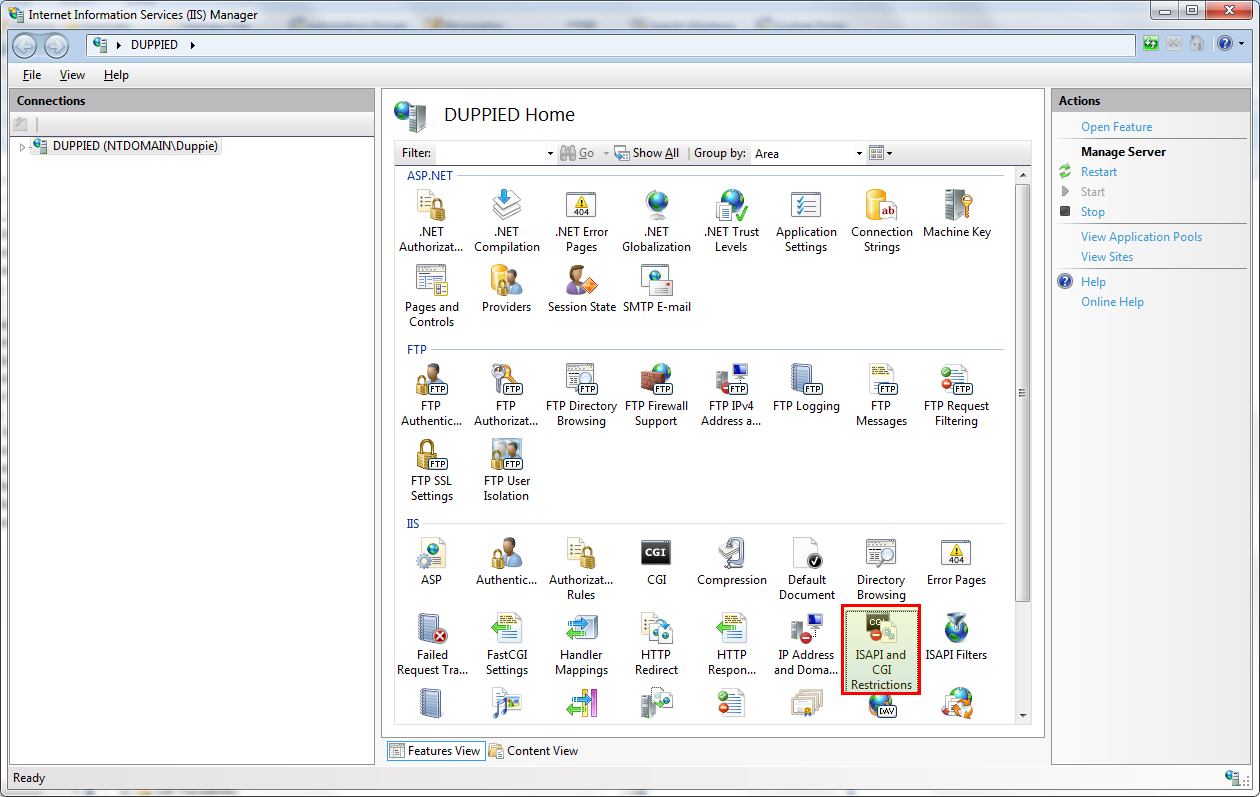
Within the "IIS Manager," open the "ISAPI and CGI Restrictions" feature.
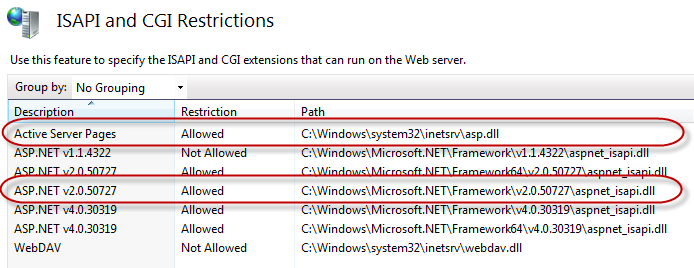
Confirm that the following entries are set to “Allowed":
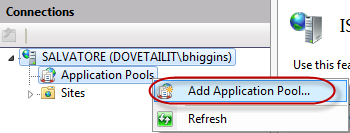
To add a new Application Pool, right-click on "Application Pools." Select “Add Application Pool…"
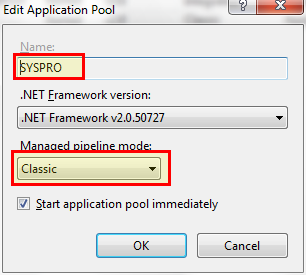
Name your new Application Pool “SYSPRO." Make sure that the .NET Framework version is “.NET Framework v2.0” and that the "Managed pipeline mode" is “Classic.”
Select "Application Pools" in the left window pane under your server. This displays all Application Pools in the primary pane of the window.
Select your “SYSPRO” Application Pool. Then choose “Advanced Settings…” on the far right.

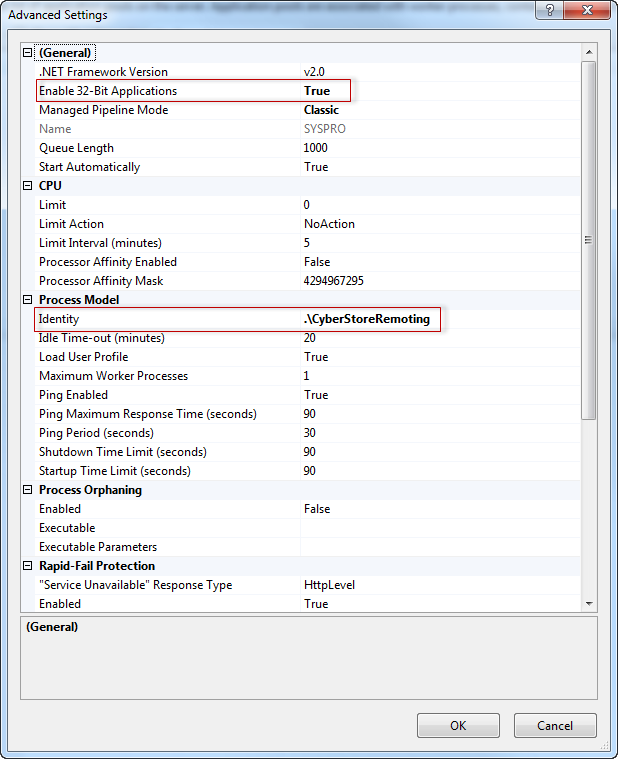
If you are running a 64-bit operating system, set “Enable 32-Bit Applications” to “True.” Click OK.
Change the “Identity” to the “Service User” you created in the Prerequisites.
Important:
If your “Service User” is a local user on the SYSPRO ERP server, be sure to preface the user with .\ when updating the Identity user. For example, for CyberStoreRemoting on the local server, you would enter .\CyberStoreRemoting.
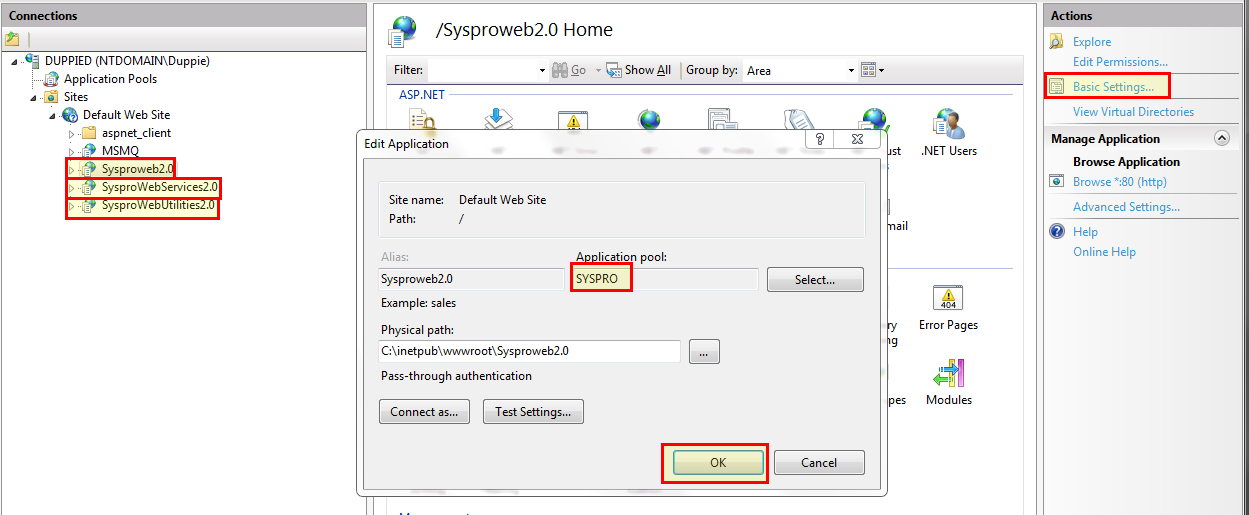
Update the SYSPROWebServices virtual directory to use the SYSPRO Application Pool you just created.
In IIS Manager, make sure that your virtual Site is expanded. Then select the SYSPROWebServices directory.
In the pane to the right of the window, click on “Basic Settings…” In the resulting window, click the Application Pool Select... button and choose the “SYSPRO” Application Pool.
