

A Model is a single Item that consists of many similar Items. Items grouped together within a Model are a different Item type, known as a SKU. All SKUs belong to one, and only one, Model. SKUs that are linked to the same Model have only slight variations in form, fit, or function, and typically have more similarities than differences between them.
A Model represents a type of Item designed to combine other very similar Items. In contrast, a Category organizes Items at a higher level and therefore represents a group of any Items no matter how alike or different they may be.
Since Models are in and of themselves Items, they too have unique stock codes, which we refer to as "Model Numbers" in this context.
A red polo shirt is available in 5 different sizes, but each sized shirt is otherwise the same. We can make the red shirt a Model and each of the individually sized shirts a different SKU. Then we can make a green shirt of the same style a different Model with its individually sized green shirts as SKUs. After we have done this, since the green and red shirts are both polo shirts, we can group the Models together in a single "Polo Shirt" Category.
The table below illustrates this example:
| Item | Description | Stock Code | Item Type |
|---|---|---|---|
|
|
Red Polo Shirt | SHPOR | Model |
| Red Polo Shirt, Men's Small | SHPOR-SM | SKU | |
| Red Polo Shirt, Men's Medium | SHPOR-MD | SKU | |
| Red Polo Shirt, Men's Large | SHPOR-LG | SKU | |
| Red Polo Shirt, Men's Xtra Large | SHPOR-XL | SKU | |
| Red Polo Shirt, Ladies Small | SHPOR-LS | SKU | |
|
|
Green Polo Shirt | SHPOG | Model |
| Green Polo Shirt, Men's Small | SHPOG-SM | SKU | |
| Green Polo Shirt, Men's Medium | SHPOG-MD | SKU | |
| Green Polo Shirt, Men's Large | SHPOG-LG | SKU | |
| Green Polo Shirt, Men's Xtra Large | SHPOG-XL | SKU | |
| Green Polo Shirt, Ladies Small | SHPOG-LS | SKU |
Note:
Models do not exist in SYSPRO as stock codes. Therefore, any Models you create only affect the Items' organization and presentation in CyberStore.
The use of Models allows a shopper to better see the variety of products you have available without displaying every product variation in your Item listings.
On a Category listing page, the shopper can click on the icon for a Model that directs them to a Model landing page. Once the shopper is on a Model landing page, they can navigate to SKU pages, which contain an individual Item's information as loaded from SYSPRO. The shopper can only access SKU pages from a Category listing page by first navigating to the Model landing page.
Models also enhance the Search Engine Optimization for your web store. When a shopper searches for a type of product, they can be directed to a Model landing page. Here they can see a variety of options for the product they are seeking rather than being directed to a page for a specific Item.
However, if a shopper searches for a specific SKU, this SKU page appears in the search results.
There are some key differences between a Model landing page and a SKU page. Let's take a closer look using images from our own Site.
See the example below of a Model landing page as it appears to the shopper:
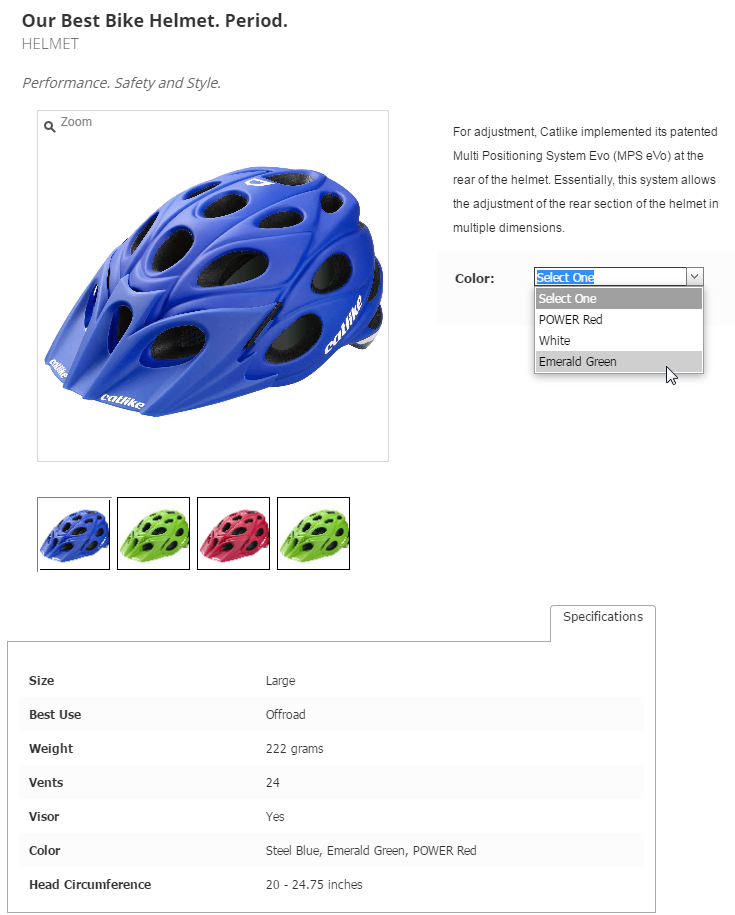
Note that the Model landing page includes a description and the Characteristics that are representative of each of the SKUs (i.e., the various colored helmets) contained within this Model. A shopper can access each of the SKUs within this Model by either selecting the image of the individual SKU or by selecting the SKU according to a Characteristic variation (i.e., color) in a drop-down list next to the Model image. The shopper cannot add any Items to the Cart from this page.
See the example below of a page for a SKU as it appears once a shopper navigates here from the Model landing page:
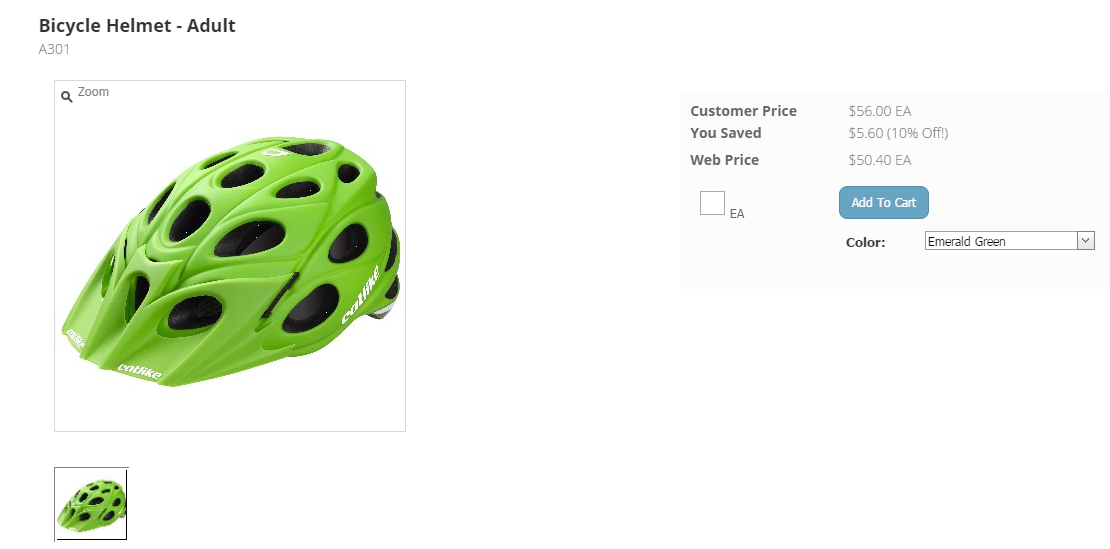
Note that on the SKU page, the shopper can view the specific Item available for purchase that has been loaded from SYSPRO. They can add this Item to the Cart and select the quantity to purchase.
Note:
If you list Items by stock code on a Category listing page and a shopper clicks on that Item's icon, they are directed immediately to the page seen above rather than to the Model landing page.
There are two methods that you can use to create Models for your Items.
Note:
These instructions are intended to provide you with a general understanding of the process of creating Models. However, because each Site is different, there is no single method for designating the Characteristics that a set of SKUs differs by. Do not hesitate to reach out to us so that we can work with you in this process.
You can use the Item Maintenance screen to add new Items as models.
To access this page, go to Items > Item and Category Maintenance in the Console.
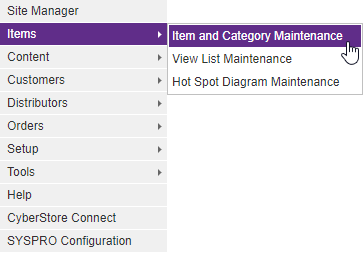
When the Item grid completes loading, click the Add button which will then launch the SYSPRO Stock Code lookup.
Clicking the "Item Not in SYSPRO?" link allows you to enter a new Item as a Model.
You will first be prompted to confirm your intention:
Click the OK button and you will be loaded in the Item Maintenance where you can enter the desired Model Number in the Stock Code field and complete entering the information about your Model. (Note that the Item Type is automatically set to be a "Model").
You can also create Models inside of CyberStore through the "Item and Category Maintenance" page.
To access this page, go to Items > Item and Category Maintenance in the Console.

The Category Tree appears on the left side of the screen.
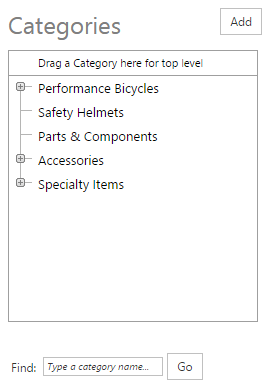
Right-click on the Category within which you want your Model to appear. Select "Edit Category."
When the "Item Category Maintenance" pop-up appears, navigate to the Items tab.
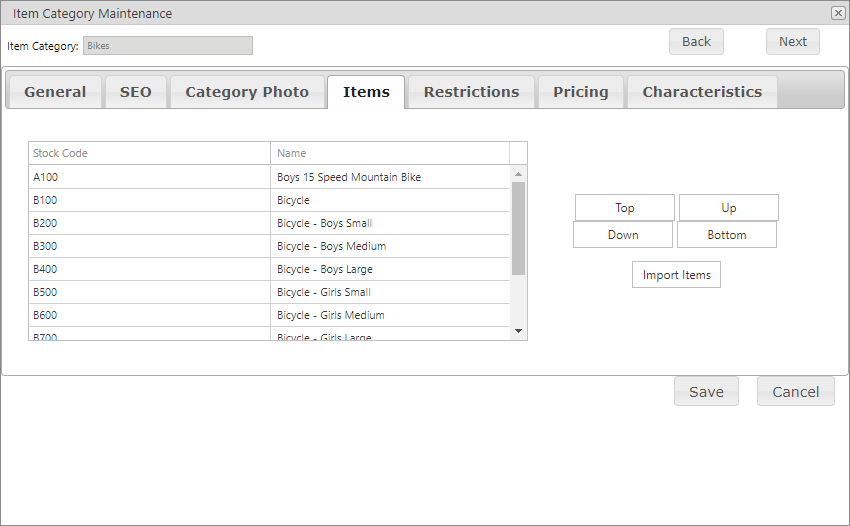
Click Import Items . The "Category Item Import" screen pops up.
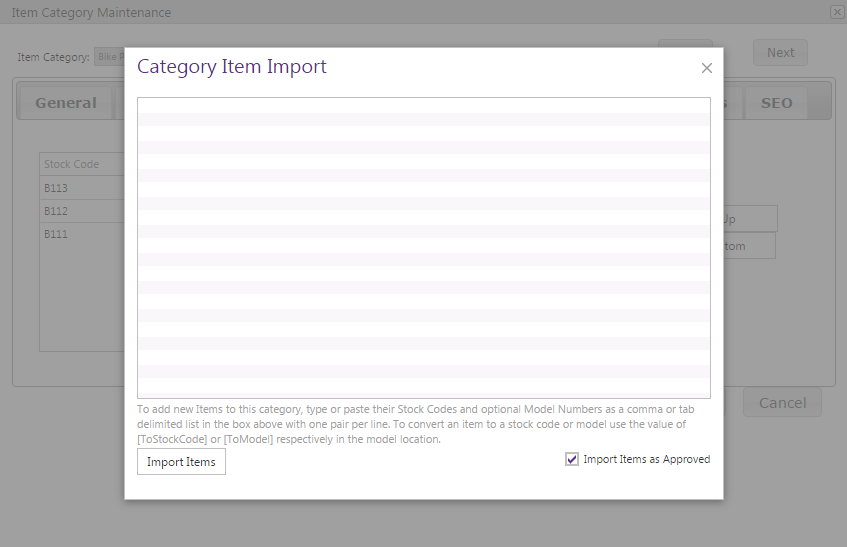
List the stock codes on individual lines for each Item that you want to be contained within a Model. After each, either click Tab or insert a comma. Then list the corresponding Model Number (see the section above for information about choosing a Model Number).
Click Import Items when you are finished. Then click Save.
Note:
When you click Import Items, CyberStore updates your Item information. Any new Items not previously in CyberStore are added. Any Items already uploaded to CyberStore are NOT duplicated. This information is simply updated with new Model information.
To complete the creation of your Models, navigate to Tools > System Utilities.

Under the General tab of the "Common Utility" pop-up, you should see the section titled, "Verify Model and SKU Categories."

This utility examines all of the SKUs in all Categories and ensures that their Models are also members of the same Categories.
Important:
The verify process does not link all of the SKUs of a Model into any Category, even when Models are linked to the Category. This is by design. To understand this, review the shirt example above. It would certainly be possible to create a Category called "Polo Shirts" that would naturally include all Models and all SKUs of polo shirts, but it is just as appropriate to create a Category called "Small Shirts" as a Sub Category to "Polo Shirts" but this would only include the small SKUs.
To verify your Models and SKUs through all Categories, click Verify.
Now that you have created your Model, you can choose how you want it to appear on your Site. This process is similar to the way you maintain your individual Items on the Site.
Go to Items > Item and Category Maintenance in the Console.

The "Items" grid appears on the right side of the screen.
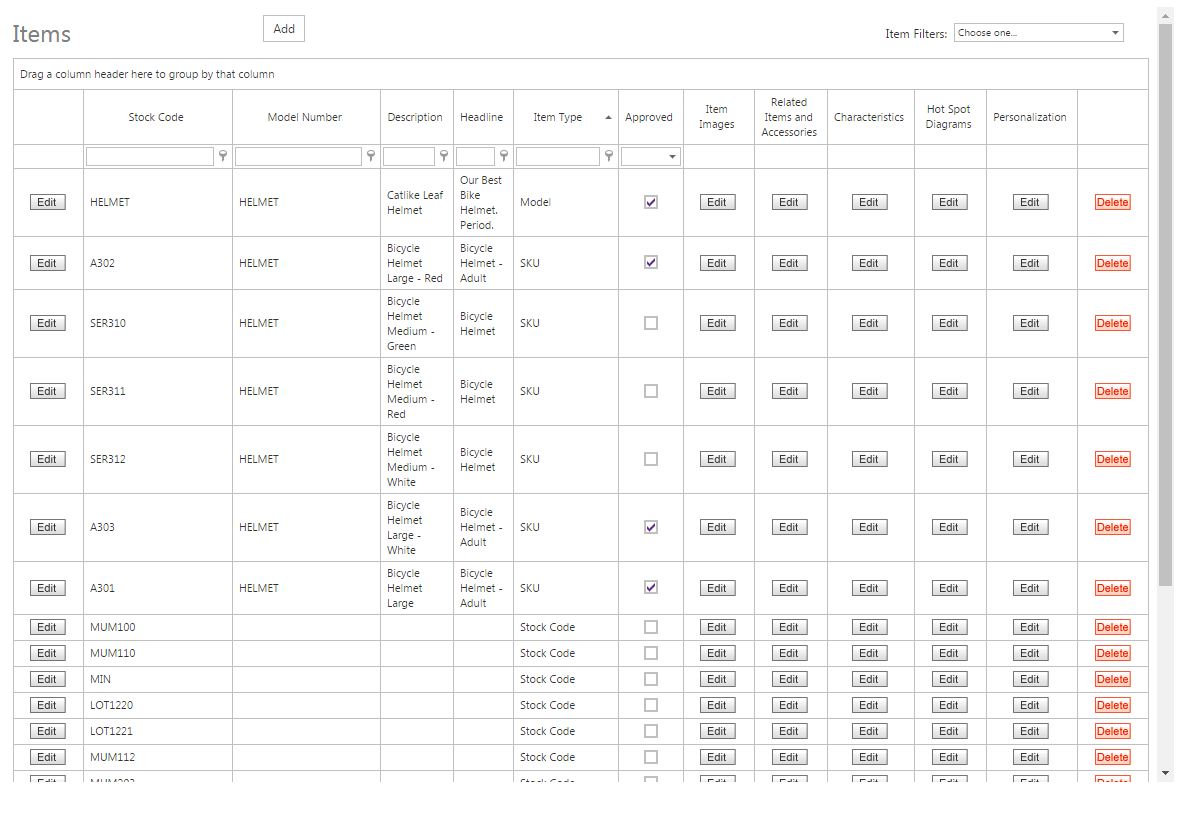
Each row in this grid represents a page that shoppers can navigate to in your web store. For pages associated with a specific Model, an identifier appears under the "Model Number" column. The "Item Type" column indicates whether that page is the "Model" landing page or a "SKU" page.
Click the corresponding Edit button for your Model page. The "Item Maintenance" pop-up appears.
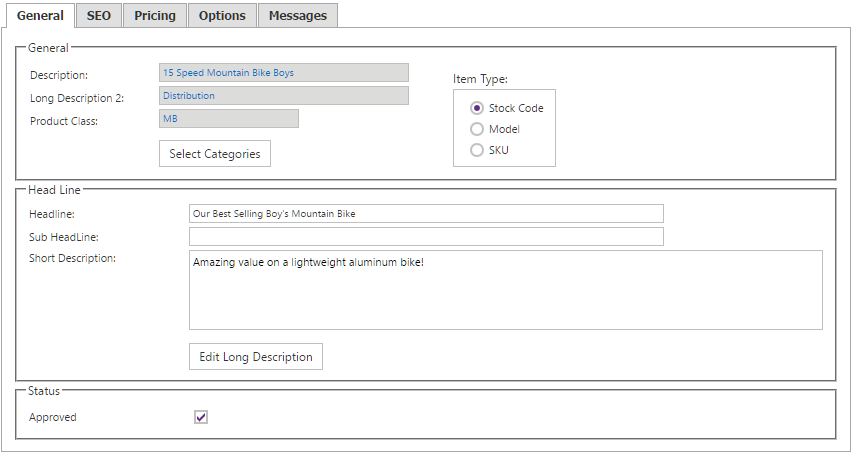
As you would for an Item in your web store, go through each of the tabs in the pop-up. Fill in the information that you want to appear on the Model landing page. Most likely, you want to focus on writing the long description.
Whichever fields you fill in, make sure this information is applicable to every SKU within the Model. With this being said, the Model landing page might contain information and a featured image that is nearly identical to those on one of the SKU pages, depending on the degree of variations between your SKUs.
A final note, you are still able to fill in information within the gray fields. The gray coloring simply means that the information for that field could not be carried over from SYSPRO.
Note:
Be sure to click the  button when you are finished making any edits.