CyberStore E-Payment 2023 Documentation
Customer Class Maintenance
The "Customer Class Maintenance" grid allows you to maintain your Customer Classes and the information about them.
To access the grid in the Console menu, go to Customers > Customer Class.
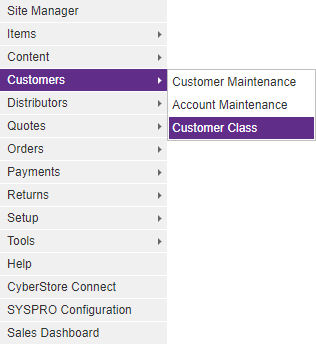
When the application has loaded, the "Customer Class Maintenance" grid appears on the screen.
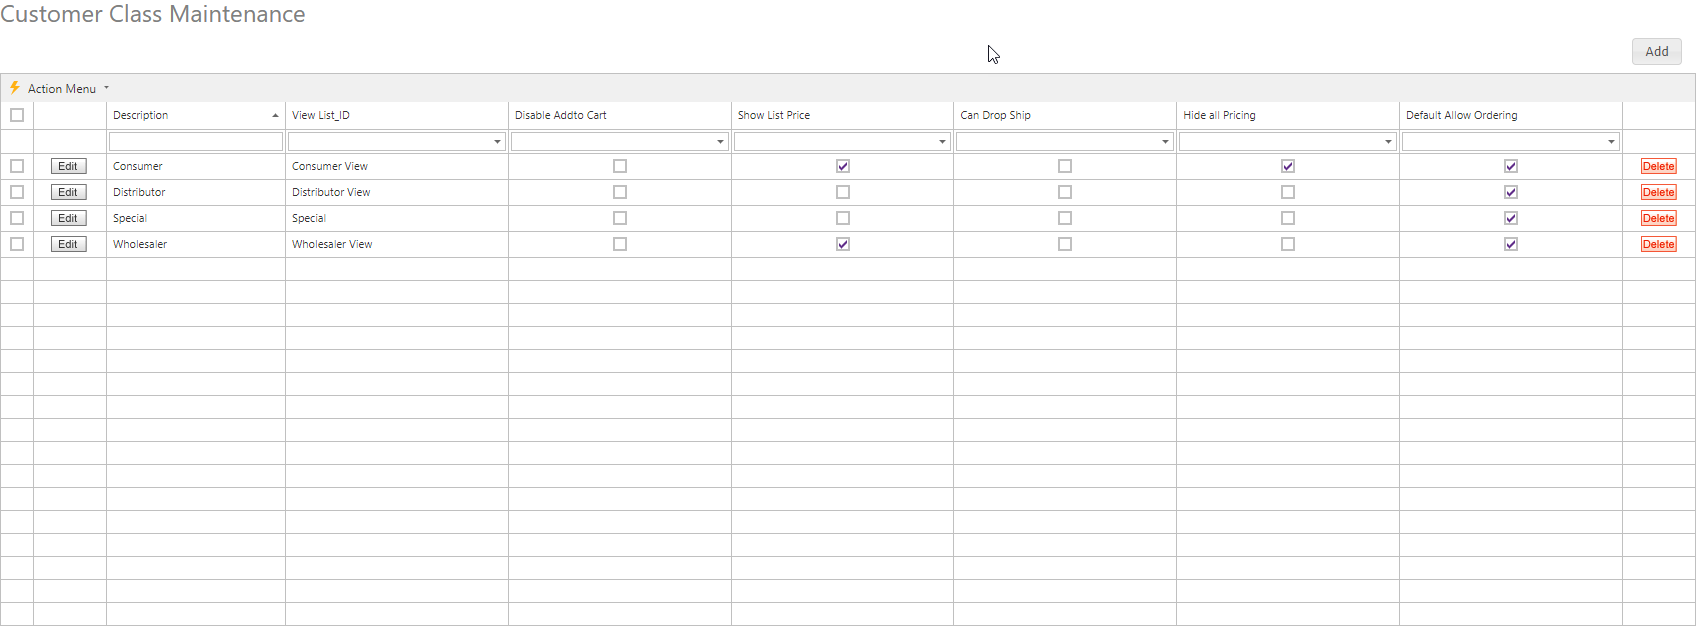
When you click the Edit or Add button, the "Customer Class" pop-up appears. You can also access this pop-up by double-clicking on a row. This pop-up contains the following tabs:
General Shipping Settings Characteristics
Use these tabs to maintain the key elements of a Customer Class. Any changes modify how that Customer Class interacts with CyberStore.
Use the General tab to maintain general Customer Class information and to configure options.
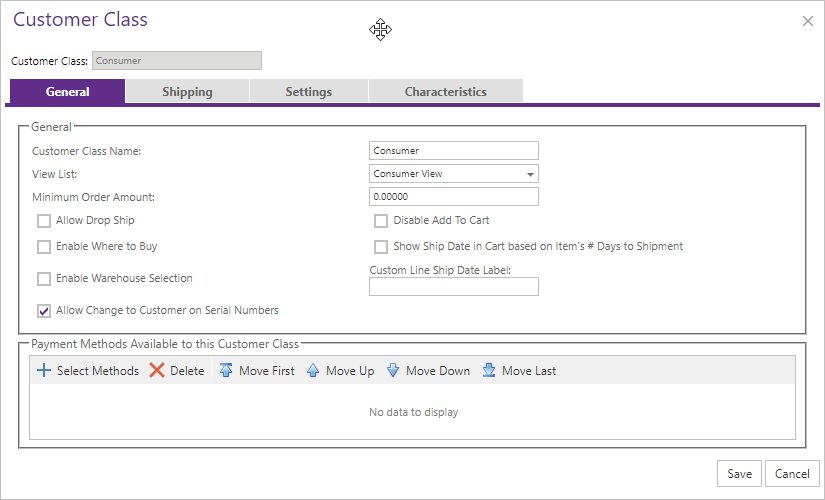
The General tab contains the following elements:
| General Information | |||||||||||||||
|---|---|---|---|---|---|---|---|---|---|---|---|---|---|---|---|
| Customer Class Name | The Name of the Customer Class. | ||||||||||||||
| View List | The View List for this Customer Class that determines which Items this group of Customers can see while browsing your Site. | ||||||||||||||
| Minimum Order Amount | The minimum amount of money that this Class must spend, before taxes, to successfully place an order. | ||||||||||||||
| Allow Drop Ship | Allow on-file Shoppers to submit a one-time shipping address when checking out. | ||||||||||||||
| Disable Add To Cart | Turn off/on the ability to add items to the cart. | ||||||||||||||
| Enable Where To Buy | Turn on/off the CyberStore dealer locator link for Items. | ||||||||||||||
| Show Ship Date in Cart based on Item's # Days to Shipment | Allow the display of estimated ship date in the Shopping Cart. | ||||||||||||||
| Enable Warehouse Selection | Turn on/off the ability for the shopper to self-select the warehouse to ship from when adding to the cart. | ||||||||||||||
| Custom Line Ship Date Label | Column header label text for the ship date when displayed in the Shopping Cart. | ||||||||||||||
| Payment Methods Available to this Customer Class |
Select which Payment Methods that members of this Customer Class can choose from.
|
Note:
Be sure to click the  button when you are finished making any edits.
Use the Shippingtab to manage shipping options and messages for a particular Customer Class.
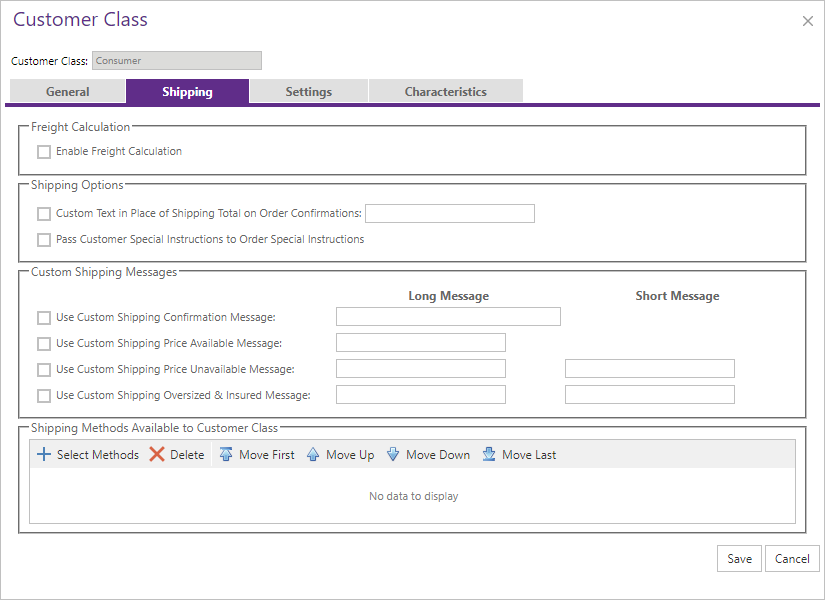
The Shippingtab contains the following sections:
| Shipping Information | |||||||||||||||
|---|---|---|---|---|---|---|---|---|---|---|---|---|---|---|---|
| Freight Calculations | By checking this box you are allowing CyberStore to calculate pass freight line and chose an appropriate shipping method. By not allowing Cyberstore to calculate shipping the Customer is given a drop down box containing shipping provider options and prices. | ||||||||||||||
| Shipping Options | Enable whether CyberStore will calculate freight charges in CyberStore. | ||||||||||||||
| Custom Shipping Messages | You can check a box for a given situation in which you want the Customer to receive a custom shipping message. When you do so, enter your message into either the corresponding "Long Message" or "Short Message" field, accordingly. | ||||||||||||||
| Custom Shipping Price Available Message | By checking this box your custom message will be sent to the Customer when the shipping price is available. | ||||||||||||||
| Custom Shipping Price Unavailable Message | By checking this box your custom messages will be sent to the Customer when the shipping price is unavailable. | ||||||||||||||
| Custom Shipping Oversized and Insured Message | By checking this box your custom messages will be sent to the Customer if the Customer is purchasing Oversized or Insured products. | ||||||||||||||
| Shipping Methods Available to this Customer Class |
Select which Shipping Methods that members of this Customer Class can choose from.
Implementer's Note: The option "{Customer Ship Via}" is automatically included as a Shipping Method for any Account linked to a Customer in the Customer Class when the following conditions are met:
|
Note:
Be sure to click the button when you are finished making any edits.
Use the Settingstab to manage the default settings for your new Accounts.
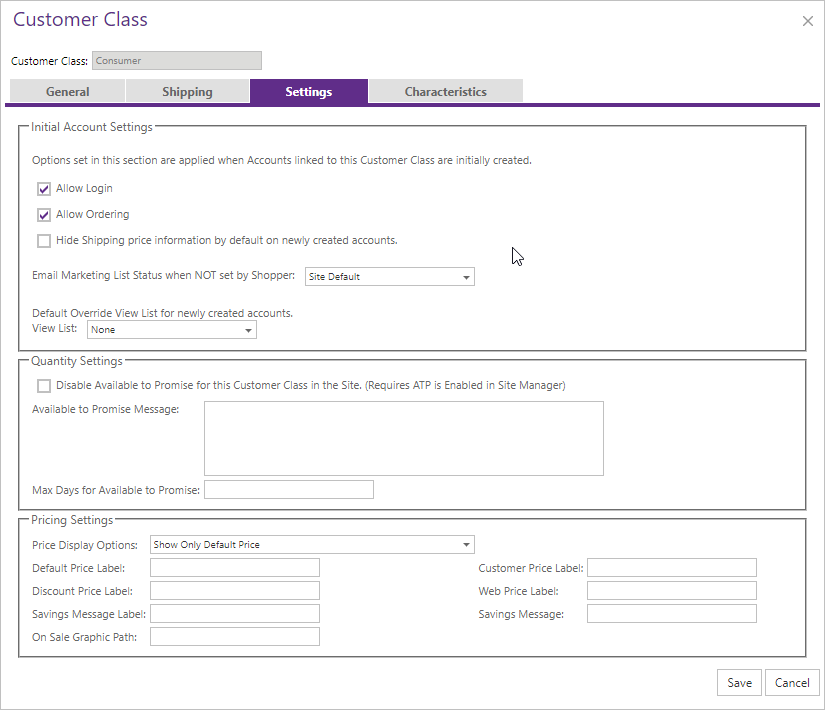
The Settings tab contains the following settings:
| Settings Information | |||||||||||||||
|---|---|---|---|---|---|---|---|---|---|---|---|---|---|---|---|
| Allow Ordering | Sets the default setting for new Accounts of Customers linked to the Customer Class as to their ability to place orders. | ||||||||||||||
| Hide Shipping price information by default on newly created Accounts. | Prevents new Accounts of Customers linked to the Customer Class from viewing shipping expenses. | ||||||||||||||
| Default Override View List for newly created Accounts | Allows you to set a new View List that is automatically assigned to new Accounts. | ||||||||||||||
| Quantity Settings |
Allows for overriding site-level Available to Promise settings when enabled in the Quantity Settings tab of the Site Manager > Catalog Configuration maintenance screen.
|
||||||||||||||
| Pricing Settings |
Allows for selecting which pricing information to show (or hide) for the Customer Class as well as the ability to override the price labels and properties used for Item pricing. Price Display Options: Choose from the dropdown the type of pricing display for any PricingControl used in the CyberStore front-end by this Customer Class.
Universal Pricing Rules:
Pricing Labels: Enter here any unique pricing labels for each Customer Class. Default values for the Customer Class pricing label options are all blank text. Processing will use the Site Manager settings by default, which will be overridden when set at the Customer Class level with values that are not blank, which in turn will be overridden by any non-blank values set using DefaultPriceLabelText, CustomerPriceLabelText, DiscountPriceLabelText, WebPriceLabelText, SavingsMessageLabelText, SavingsMessage or OnSaleGraphicPath properties of any PricingControl. |
If you override a View List by default for newly created Accounts, choose the desired View List from the drop-down list.
Note:
Be sure to click the button when you are finished making any edits.
Use the Characteristicstab to [description].
In order to prevent non-standard formats being introduced when pasting content from other sources into the the editor, the process will automatically filter out some HTML attributes or tags so that they are not present after pasting.
The following HTML tags and attributes will be ignored during paste function:
Note:
Be sure to click the button when you are finished making any edits.
To remove a Customer Class and all of the information about it, click on the Delete button within the grid.