
CyberStore E-Payment 2023 Documentation
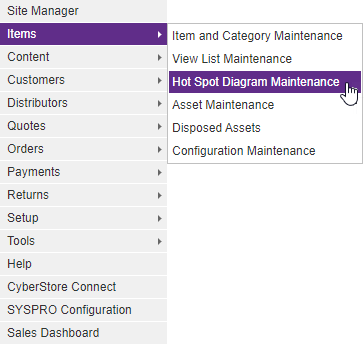
Hot Spot Diagram Maintenance
The "Hot Spot Diagram Maintenance" grid allows you to maintain the Hot Spot Diagrams for your various Items.
To access the grid in the Console menu, go to Items > Hot Spot Diagram Maintenance.
When the application has loaded, the "Hot Spot Diagram Maintenance" grid appears on the screen.
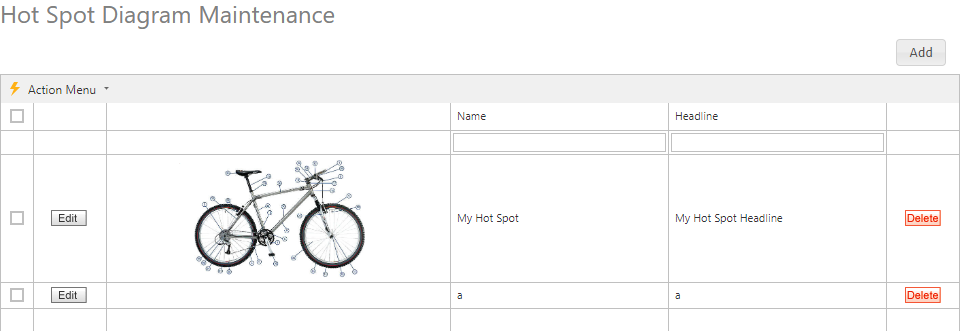
The Maintenance grid offers the following functions:
After you select the Add or Edit button on the grid, the grid's maintenance pop-up appears. Then you can add or edit specific information. After you select the Delete button, the Console asks you to confirm the deletion, and once confirmed permanently deletes the row.
A right-click Context Menu provides functions available for indivdual rows, one at a time.
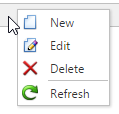
Simply right-click on a row, then pick from the list of available options for the grid, and the selected action will be performed just on that row. Even if multiple rows are selected using checkboxes, only a single row is affected by the context menu selection.
A bulk Action Menu can be found in the top left heading area of any applicable data grids in the CyberStore Console. The action menu allows a site adminstrator to select one (or many) records by using the left most check box column in any applicable data grid. A user can select (and deselect) all records by clicking the checkbox directly below the Action Menu's lightning bolt. Below is an example of selectable checkboxes and an Action Menu:
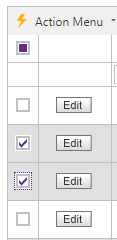
When selecting rows for bulk actions, rows can be filtered, and the grid can be paged, and when the action is performed all selected records will be acted upon by choosing the desired action
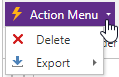
Selecting Delete will permanently remove all selected rows. A confirmation screen will be displayed which must be confirmed before the removal happens.
The Export option will show a list of exportable formats available (currently XLSX and XLS formats for Excel, a PDF file, or CSV formatted data). When a format is selected, the CyberStore data for all selected rows will be downloaded to a file which can be saved to your desktop or device for use offline.
When you click either the Edit or Add button, the "Hot Spot Diagram" pop-up appears. This pop-up contains the following tabs:
General Long Description Settings Hot Spots Hot Spots Sort Order
Use these tabs to maintain the key elements of a Hot Spot Diagram. Any changes modify how a Hot Spot Diagram is displayed on the website.
Use the the General tab to maintain general Hot Spot Diagram information and to configure options.
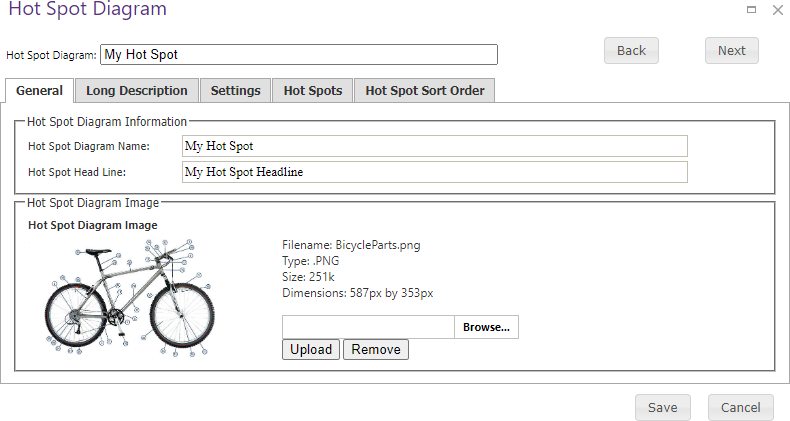
The General tab contains the following sections:
| General Information | |
|---|---|
| Hot Spot Diagram Information |
Hot Spot Diagram Name: The name of the diagram. Hot Spot Head Line: A headline that can be used about the diagram |
| Hot Spot Diagram Image |
To choose an image, click Browse... and select your desired image. Then click Upload to finalize your choice. You should then see a preview of this image within the tab. Details about the filename, file type, file size, and image dimensions should also appear. If you already have a image uploaded but would like to change it, first click Remove before proceeding to add a new one. |
Note:
Be sure to click the  button when you are finished making any edits.
Use the Long Descriptiontab to [description].
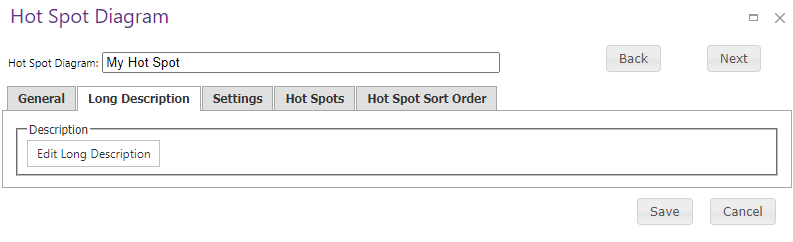
The Long Descriptiontab contains the following option:
| Long Description Information | |
|---|---|
| Edit Long Description | A button you can click to compose or edit a Long Description. |
When you click the Edit Long Description button, the "Long Description HTML Editor" pops up, allowing you to make your changes.
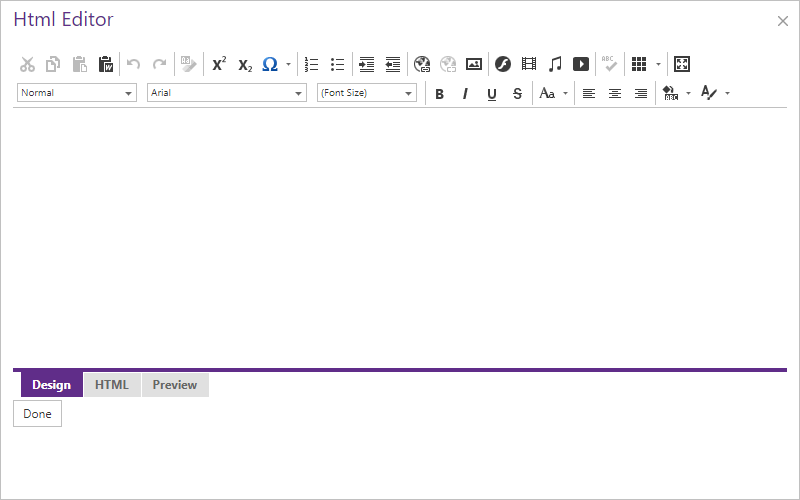
In order to prevent non-standard formats being introduced when pasting content from other sources into the the editor, the process will automatically filter out some HTML attributes or tags so that they are not present after pasting.
The following HTML tags and attributes will be ignored during paste function:
Note:
Be sure to click the button when you are finished making any edits.
Use the Settingstab to [description].
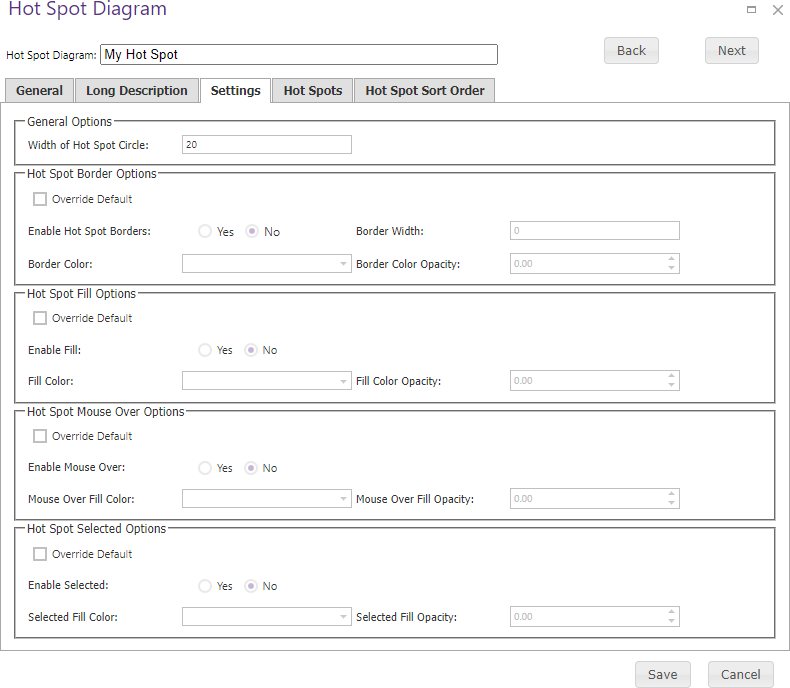
The Settings tab contains the following sections:
This tab serves as a means to override to the default diagram settings perviously set in the Hot Spots tab Site Manager > Catalog Configuration screen.
| Settings Information | |
|---|---|
| General Options | Width of Hot Spot Circle: The diameter of a Hot Spot in pixels. |
| Hot Spot Border Options |
Override Default: Check this to allow the setting to override the Site configured default. Enable Hot Spot Borders: Yes to enable, No to disable. Border Width: The border width in pixels. Border Color: The hexadecimal color for the border. Border Color Opacity: The border's opacity - 100 = fully opaque, 0 = transparent |
| Hot Spot Fill Options |
Override Default: Check this to allow the setting to override the Site configured default. Enable Fill: Yes to enable, No to disable. Fill Color: The hexadecimal color for the fill. Fill Color Opacity: The fill opacity - 100 = fully opaque, 0 = transparent |
| Hot Spot Mouse Over Options |
Override Default: Check this to allow the setting to override the Site configured default. Enable Mouse Over: Yes to enable, No to disable. Mouse Over Fill Color: The hexadecimal color for the fill. Mouse Over Fill Opacity: The fill opacity - 100 = fully opaque, 0 = transparent |
| Hot Spot Selected Options |
Override Default: Check this to allow the setting to override the Site configured default. Enable Selected: Yes to enable, No to disable. Selected Fill Color: The hexadecimal color for the fill. Selected Fill Opacity: The fill opacity - 100 = fully opaque, 0 = transparent |
Note:
Be sure to click the button when you are finished making any edits.
Use the Hot Spotstab to select the Hot Spots within a diagram.
To do so, position the mouse in the center of where you would like to mark a hot spot, and then left click the mouse. After doing so the position of the mouse is captured and you can fill in the data for the Hot Spot.
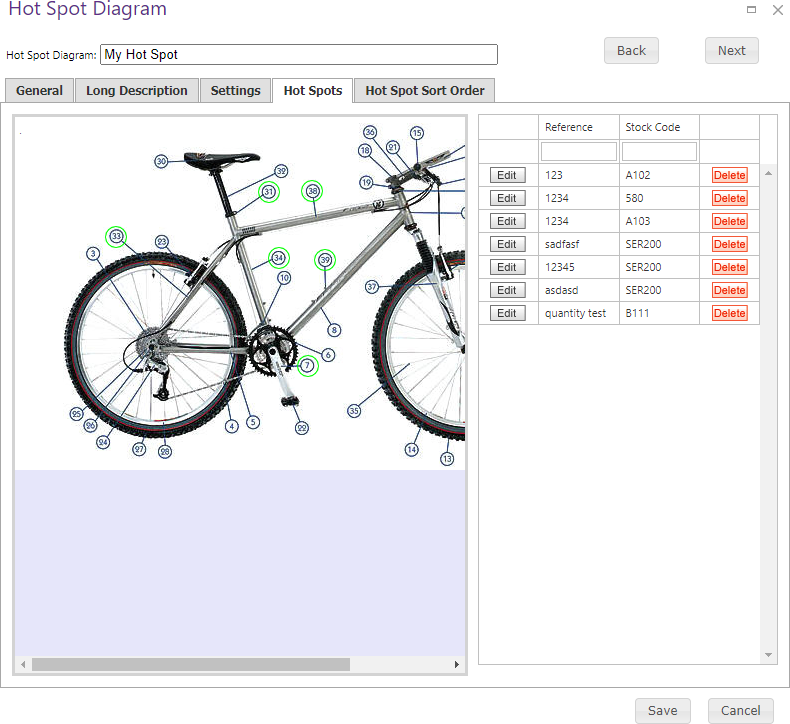
The Hot Spots tab contains the following:
When you click on the Edit button within this grid, you can make changes to the following sections:
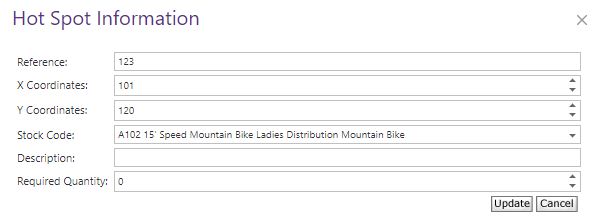
These sections within the Hot Spots tab include:
| Hot Spots Information | |
|---|---|
| Reference | A reference number tied to the Hot Spot. |
| X Coordinates | The horizontal pixel location of the Hot Spot relative to the diagram's top left corner. |
| Y Coordinates | The vertical pixel location of the Hot Spot relative to the diagram's top left corner. |
| Stock Code | The Item the Hot Spot is linked to. |
| Description | A descriptor for the Hot Spot. |
| Required Quantity | The minimum number required to purchase the Item from the Hot Spot interface. |
Note:
Be sure to click the button when you are finished making any edits.
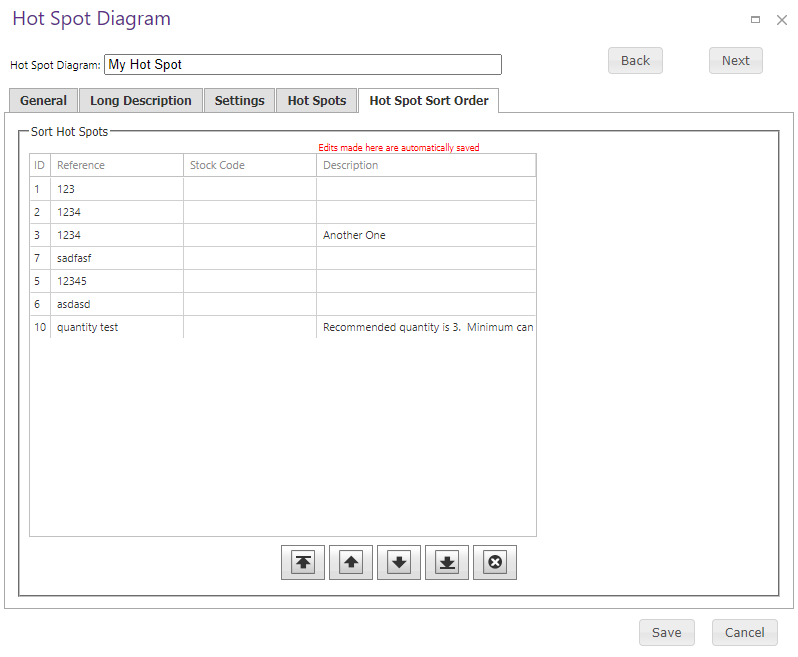
Use the Hot Spots Sort Ordertab to [description].
To remove a Hot Spot Diagram and all of the information about it, click on the Delete button within the grid.