
CyberStore E-Payment 2023 Documentation
Item Maintenance
The "Item Maintenance" grid allows you to add and maintain the Items in your catalog and the information about them.
You can access the grid in the Console menu by going to Items > Item and Category Maintenance.

When the application has loaded, the "Item Maintenance" grid appears on the right side of the screen.
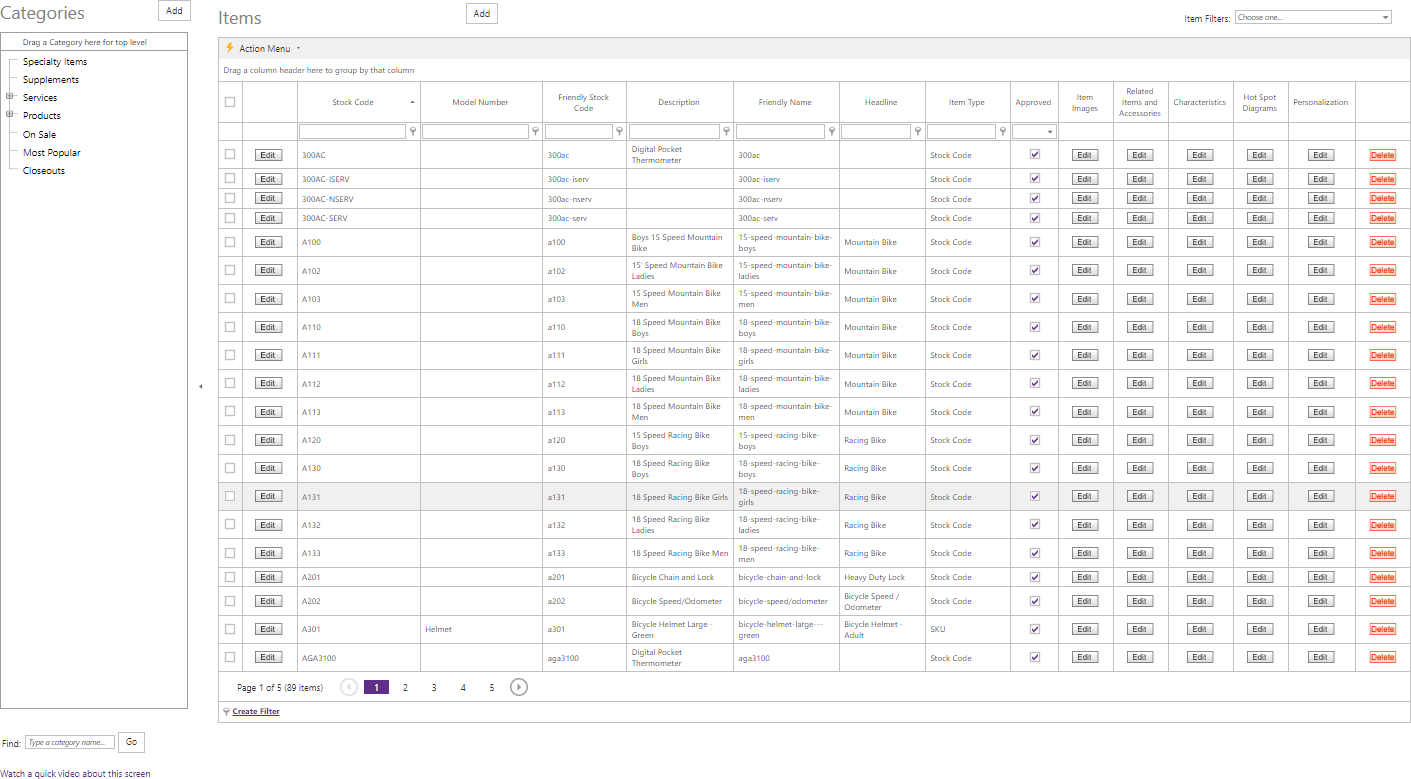
The Maintenance grid offers the following functions:
After you select the Add or Edit button on the grid, the grid's maintenance pop-up appears. Then you can add or edit specific information. After you select the Delete button, the Console asks you to confirm the deletion, and once confirmed permanently deletes the row.
A right-click Context Menu provides functions available for indivdual rows, one at a time.
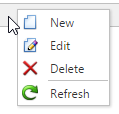
Simply right-click on a row, then pick from the list of available options for the grid, and the selected action will be performed just on that row. Even if multiple rows are selected using checkboxes, only a single row is affected by the context menu selection.
A bulk Action Menu can be found in the top left heading area of any applicable data grids in the CyberStore Console. The action menu allows a site adminstrator to select one (or many) records by using the left most check box column in any applicable data grid. A user can select (and deselect) all records by clicking the checkbox directly below the Action Menu's lightning bolt. Below is an example of selectable checkboxes and an Action Menu:
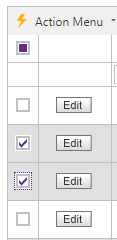
When selecting rows for bulk actions, rows can be filtered, and the grid can be paged, and when the action is performed all selected records will be acted upon by choosing the desired action
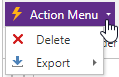
Selecting Delete will permanently remove all selected rows. A confirmation screen will be displayed which must be confirmed before the removal happens.
The Export option will show a list of exportable formats available (currently XLSX and XLS formats for Excel, a PDF file, or CSV formatted data). When a format is selected, the CyberStore data for all selected rows will be downloaded to a file which can be saved to your desktop or device for use offline.
The Item action menu inclueds thee following item specific actions:
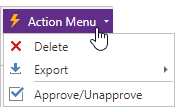
The Upprove/Unapprove option allows one or more selected rows to be set as approved or unapproved in a single action.
The table below lists which CyberStore Item Master fields are used to store SYPSRO Data from an Item query:
| CyberStore Item Field | SYSPRO Item Query Node (//InvQuery/StockItem/...) |
|---|---|
| StockCode | StockCode |
| Mass | Mass |
| Volume | Volume |
| Name | Description |
| LongDescription2 | LongDesc |
| TechnicalInformation | Narrations/TechnicalInformation |
| Unit | StockUom |
| AltUnit | AlternateUom |
| PriceMethod | PriceMethod |
| OtherUnit | OtherUom |
| AltUnitConversion | ConvFactAltUom |
| OtherUnitConversion | ConvFactOthUom |
| AltUnitConversionFactor | ConvMulDiv |
| OtherUnitConversionFactor | MulDiv |
| UserField1 | UserField1 |
| UserField2 | UserField2 |
| UserField3 | UserField3 |
| UserField4 | UserField4 |
| UserField5 | UserField5 |
| WarehouseToUse | WarehouseToUse |
| ProductClass | ProductClass |
| KitType | KitType |
| SerialMethod | SerialMethod |
| TraceableType | TraceableType |
| ListPrice | SellingPrice |
| ListPriceUOM | PriceBasis |
When you click Add or Edit, the "Item Maintenance" pop-up appears. This pop-up contains information on Item stock codes and URLs in addition to the following tabs:
The tabs contain key information about each Item. Any changes modify how the Item is displayed on the website.
Important Note:
In order to Add a stock code into CyberStore as an Item, the stock code must be a stocked item in SYSPRO, and if the stock code is a defined as a kit in SYSPRO, it must be an S-Type kit. Stock codes that do not fit either of these requirements will not be able to be used by CyberStore.
Above each tab within the pop-up, you may notice a field containing the Item's "Stock Code" as loaded from SYSPRO as well as the "Item URL Path."
Click the Edit button to ensure that the URL previously selected is valid. This strips the URL of any invalid characters and corrects incomplete code.
Use the General tab to maintain general Item information.
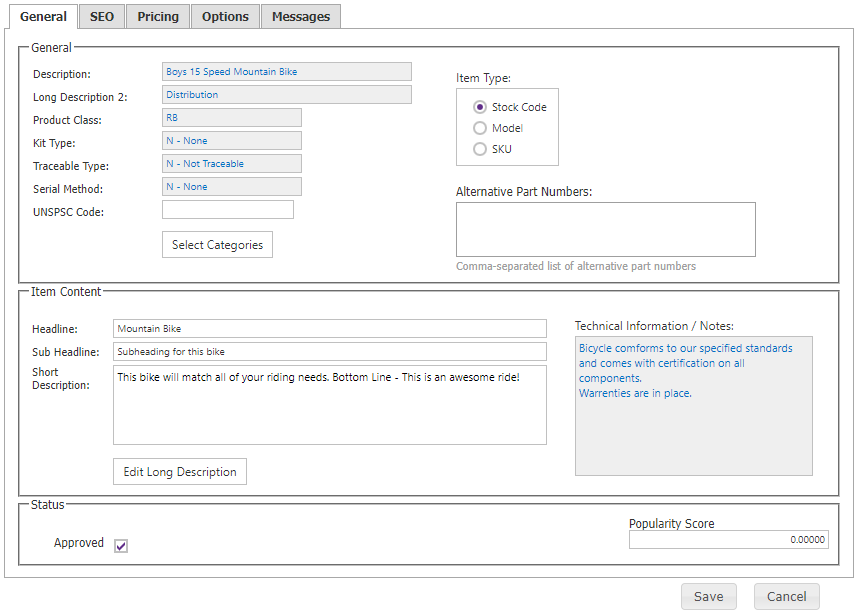
The General tab contains the following elements:
| General Information | |
|---|---|
| Description | The name used to describe the Item. It contains the SYSPRO Name of a stock code, or a CyberStore Model name. It can only be edited for Models. |
| Long Description 2 | A field used for Stock Codes and contains the Long Description from SYSPRO. It cannot be edited in CyberStore. |
| Item Type |
An input area that allows you to identify whether the Item is a Stock Code, Model, or SKU. When you change the Item Type, a message pop-up appears.
Read the warning carefully before confirming the change. When you convert an Item from a Model, you automatically convert all of the Item's related SKUs to Stock Codes. CyberStore first requires that you confirm this choice and select Save for this change to process. |
| Alternative Part Numbers |
Part numbers that can be used synonymously with the stock code or model nubmer to reference the item. When editing the list of Alternative Part Numbers in Item Maintenance, you can perfom the following:
|
| Model |
A drop-down that appears only when you identify the Item as a SKU in the "Item Type" menu.
You must select a pre-existing Model with which you want to associate the SKU. |
| Product Class | The Product Class when the Item is also in SYSPRO. It cannot be edited in CyberStore. |
| Kit Type: |
Kit type flag indicates whether, in Sales Orders, the stock item is sold using its bill of materials. Settings are as follows:
|
| Traceable Type: |
Lot traceable flag indicates whether the stock item is traceable or not. Settings are as follows:
|
| Serial Method: |
Serial tracking method flag indicates the serial tracking method to use for the stock item if serial tracking is installed. Settings are as follows:
|
| Headline | A more descriptive title for the Item in the online catalog. |
| Sub Headline | A brief alternate description for the Item in the online catalog. |
| Short Description | A short description of the Item. It is typically displayed in the Product Display Listings and Hot Buy sections of the online catalog. |
| Edit Long Description | A tool to edit a long, detailed description of the Item. This description is displayed in the "Product Detail Display" and "Featured Items" sections of the online catalog. |
| Approved | A checkbox that sets Items for display on the web. Items that are not approved do not appear in the online catalog. |
| Technical Information | An editable text box for an items technical information to be displayed on the item's respective page. |
| Popularity Score |
A checkbox that allows the user to set a popularity score for a specific item, higher score meaning more popular and lower score meaning less so. For more information see: Add Popularity Score to Item Data |
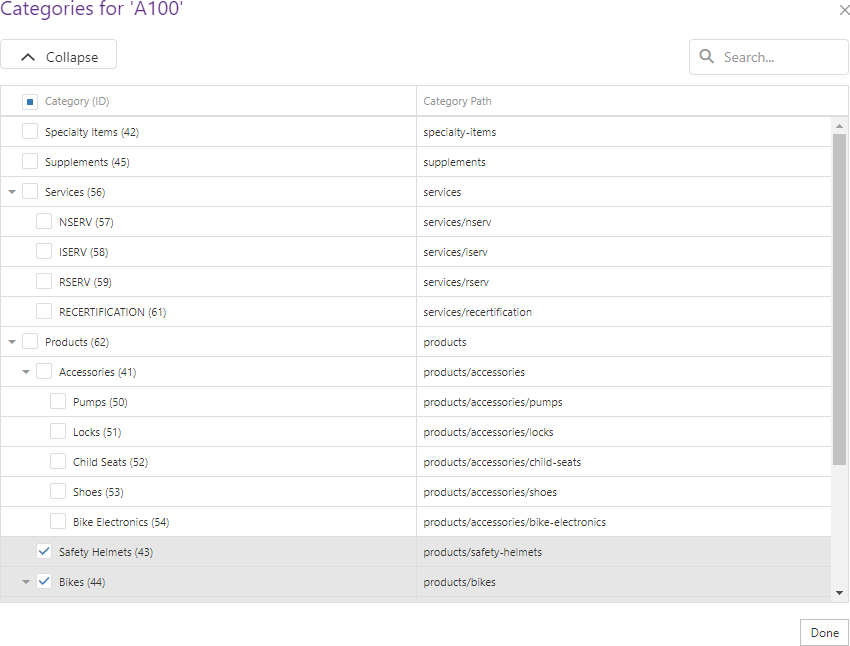
When you click the Select Categories button, the "Categories" pop-up appears, allowing you to select the Categories within which you want that Item to appear.
When you click the Edit Long Description button, the "Item Long Description HTML Editor" pops up, allowing you to make your changes.
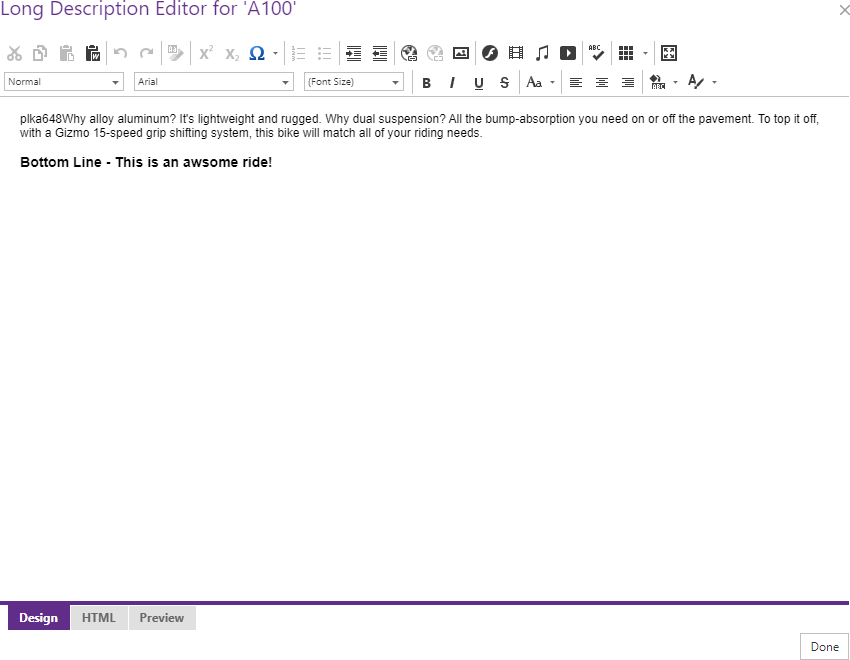
In order to prevent non-standard formats being introduced when pasting content from other sources into the the editor, the process will automatically filter out some HTML attributes or tags so that they are not present after pasting.
The following HTML tags and attributes will be ignored during paste function:
Note:
Be sure to click the  button when you are finished making any edits.
Use the SEO tab to maintain Item details that affect Search Engine Optimization.
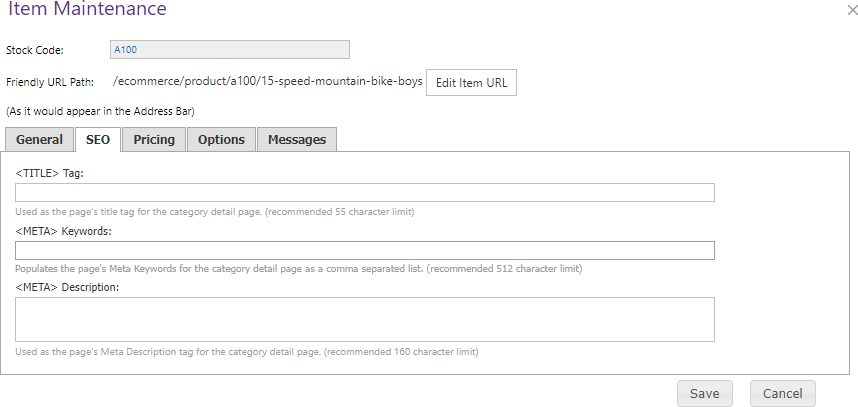
The SEO tab contains the following elements:
| SEO Information | |||||||||||||||||
|---|---|---|---|---|---|---|---|---|---|---|---|---|---|---|---|---|---|
| <TITLE> Tag |
Allows you to specify a desired "Item Detail" page name as seen in the browser's title bar. This is also how the page name appears when listed in Internet Search Engine results.
|
||||||||||||||||
| <META> Keywords | Allows you to enter important keywords that describe the Item. CyberStore inserts this information in a page's HTML as a <META> keyword code. They can be included in the default CyberStore list of search fields. Enter keywords as single words or multi-word phrases. To create individual entries, insert a comma or hit the Enter key between each word or phrase. Though input length is unlimited, it is best to limit your entry to 512 characters or less. | ||||||||||||||||
| <META> Description | Allows you to enter a short abstract that describes the Item. Insert this description as a <META> description code into a page's HTML. It is often included in Internet Search Engine results. Though input length is unlimited, it is best to limit your entry to 160 characters or less. |
Note:
Be sure to click the button when you are finished making any edits.
Use the Pricing tab to manage Item pricing and unit of measure options.
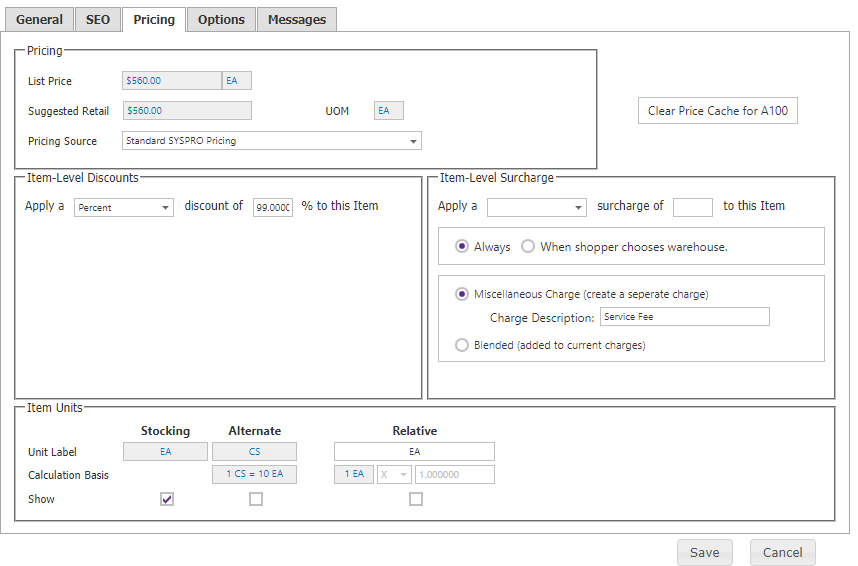
The Pricing tab contains the following elements:
| Pricing Information | |||
|---|---|---|---|
| Pricing Source |
Gives options for pricing an Item using SYSPRO. The default setting for the pricing of all Items is Standard SYSPRO Pricing. If you require an Item's price to be determined via the SYSPRO Trade Promotion Module, set this source to the Trade Promotion Management Pricing option.
|
||
| Item Level Discounts |
Allows you to set an additional CyberStore only pricing discount for an Item. You can apply a dollar or percentage based discount of any amount. When the discount is applied, it reduces the returned unit price from SYSPRO by the calculated amount of the discount.
Implementer's Note: Discounts can also be set at the category level, and when a discount is on a category and an item in that category, the discounts will be compounded based on configuration of the setting in Site Manager > Catalog Configuration screen's Pricing Settings tab. When discounts are set to compound, the category discount is applied first, then the item discount is applied on top of the category discounted amount. If compounding is disabled, then the item discount will be used.
|
||
|
Item Warehouse Selection Surc harge |
Allows you to set a price surcharge for an item when selection a ship from warehouse that is not the warehouse to use for th e item. You can apply a dollar or percentage based surcharge of any amount. When the surcharge is applied, it is added to the order as a miscellaneious line item with a single surcharge fee based on the quantity in the line. The default wording for the fee's order line is "Service Fee" which can be overridden by providing custom text in the box provided. To remove a surcharge previously configured, set its surcharge amount to 0. Implementer's Note: Warehouse selection surcharge fees can also be set at the category level, but when a surcharge is on a category and an item in that category, the item-level surcharge will be used and consequently ignoring the category-level setting. |
||
| Clear Price Cache | The Clear Price Cache for .... button will remove all cached pricing for the selected Item for all customers. Prices will then be re-cached per your site configuration as they are browsed on the front end of the site by your shoppers. | ||
| Available Units of Measure |
Displays all uniquely defined units of measure for the Item as configured in SYSPRO. By default Site visitors can purchase Items in any unique unit of measure. To show a specific unit of measure check the corresponding checkbox, and conversely, to hide a specific unit of measure, uncheck the corresponding checkbox. This section also allows you to check "Show" for the Relative UOM. When the Relative Unit differs from the Pricing Unit, the price per unit will be displayed. The Relative UOM includes both a label and a conversion formula accompanied by a conversion value and operation. By default, it is equivalent to the Stocking UOM. |
| List Price |
A read-only textbox that displays the list price that is populated from uploaded item data to the Cyberstore console. For more details see: Add List Price from SYSPRO to Item Data and ability to see it in Console |
Note:
Be sure to click the button when you are finished making any edits.
Use the Options tab to customize the Item's presentation, availability, and shipping options.
The Options tab contains the following sections:
| Options Information | |
|---|---|
| Highlight Item | Indicates whether an Item appears in the Hot Buys and/or Featured Items sections of the online catalog. |
| PDF Location | Saves a web address indicating the location of an informational PDF file. This can provide additional information about the Item and can be downloaded by the visitor. |
| Item Quantity Levels | Indicates whether the Site can sell more Items than are available in the current inventory in SYSPRO. The section also allows for an optional Inventory Buffer used to offset the actual quantity by a value. |
| Item Shipping Defaults | Identifies an Item as oversized and/or requiring insurance for shipping. When either option is selected, an online order containing the Item does not calculate shipping during the checkout process. A read-only field from SYSPRO displays the Item's mass and volume. This section also allows you to set an Item to ship from the warehouse designated in SYSPRO's warehouse to use. |
Note:
Be sure to click the button when you are finished making any edits.
The Messages tab in "Item Maintenance" allows you to customize On Hand and Lead Time Messages, as well as a custom shipping timeline for an Item. These customizations override the default On Hand and Lead Time Messages set in the Catalog Configuration section within the "Site Manager." You can find these default settings by going to Site Manager > Catalog Configuration > Quantity or to the sitepages.config file.
The Messages tab contains the following sections:
| Messages Information | |
|---|---|
| On Hand Quantity Messages |
Indicates if an Item is in stock and whether there is a limited quantity. An Item is "Available" if its On Hand quantity is not zero. An Item is "Limited" if the Item has been configured to "Limit Item to available inventory" on the Options tab. Tip: Use the Replacement Tags [QTY] and [UOM] within your messages to display the inventory quantity (determined using the On Hand Quantity Basis as setup in the Management Console in Site Manager > Catalog Configuration), and the unit of measure. For example: "[QTY] [UOM] In Stock" might render as "1,234 EA In Stock" using the unallocated quantity as a basis. Alternatively, a fixed message text could also be used which would not present actual inventory quantity. For example: "Out of Stock".
|
| Lead Time Message |
Provides the option to display an estimated shipping timeline. The "Use Custom Lead Time Message" checkbox indicates that this Item uses a custom lead time message. Specify your desired messages. Note: This calculation does not take into account the Site wide minimum Lead Time or Minimum Padding.
|
| Ship Date | Provides space to enter the number of days until an Item ships. This can be displayed in the Shopping Cart line details. |
Note:
Be sure to click the button when you are finished making any edits.
Beyond the "Approved" column on the "Item Maintenance" grid, there are up to 5 special action Edit buttons for each Item. If you click on any of these buttons, a screen pops up. You can then make changes for each Item with respect to the topic listed in the title of that column.
Use the respective Edit button to make changes to:
To remove an Item and all of the information about it, click on the Delete button within the grid.