

The "Category" tree allows you to maintain the Categories into which your Items are organized.
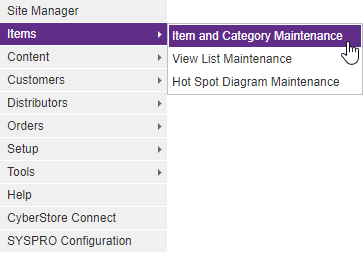
To access the tree in the Console menu, go to Items > Item and Category Maintenance.
When the application has loaded, the "Category" tree appears on the left side of the screen.
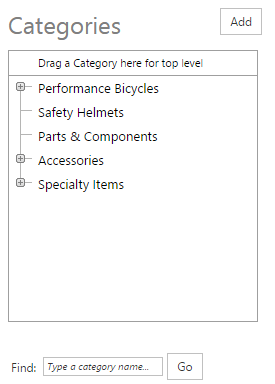
You can easily organize the Category data within your tree. Right-click over the Category to which you want to make adjustments.
The Category Maintenance drop-down menu appears:
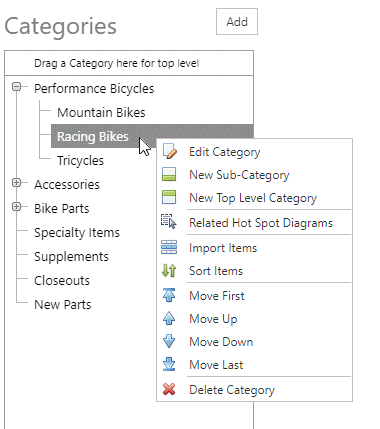
You can use the drop-down menu to make changes in the areas listed.
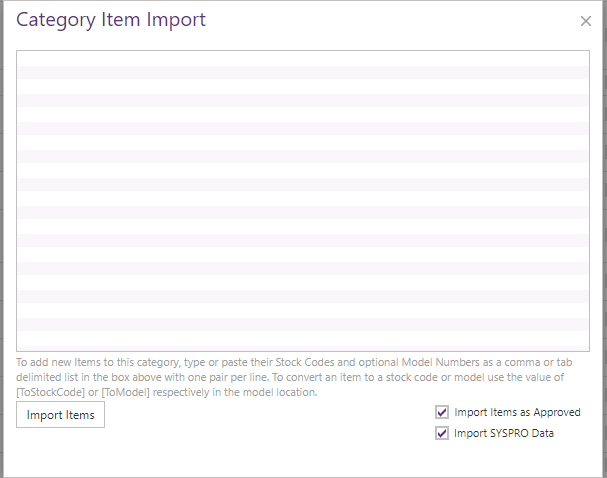
When you select the Import Items option from the menu, the "Category Item Import" pop-up appears, allowing you to add your Items. Be sure to follow the instructions near the bottom of the pop-up to ensure success.
When you select a Category from within the tree, the "Category" tree pop-up appears. This pop-up contains the following tabs:
General Category Photo Restrictions Pricing Characteristics SEO
Use these tabs to maintain the key elements of a Category. Any changes modify how the Category is displayed on the website.
Use the General tab to maintain general Category information and to configure options.
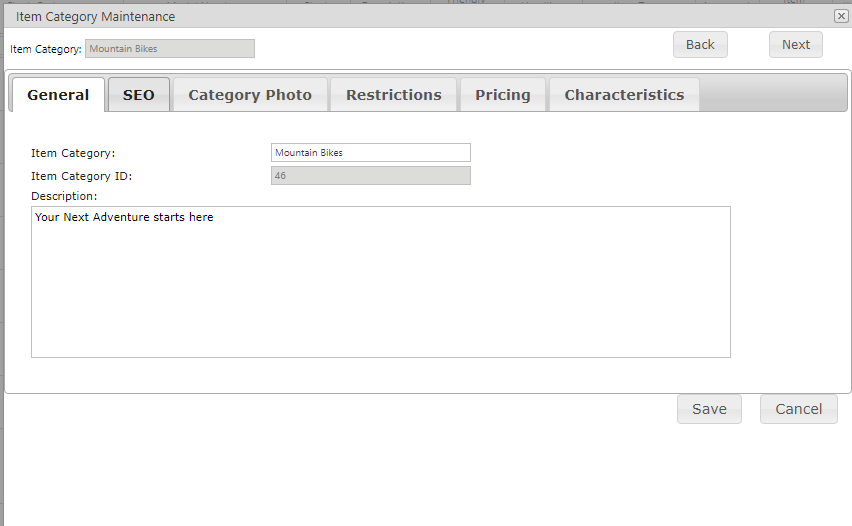
The General tab contains the following sections:
| General Information | |
|---|---|
| Item Category | The name of the Category. |
| Item Category ID | A unique identifier for the Category (this value is automatically assigned by CyberStore and is read only). |
| Description | Text that provides a general description applicable to all of the Items within the Category. You can choose whether you want this to appear on your Site. |
Note:
Be sure to click the  button when you are finished making any edits.
Use the SEOtab to maintain Item Category details that affect Search Engine Optimization.
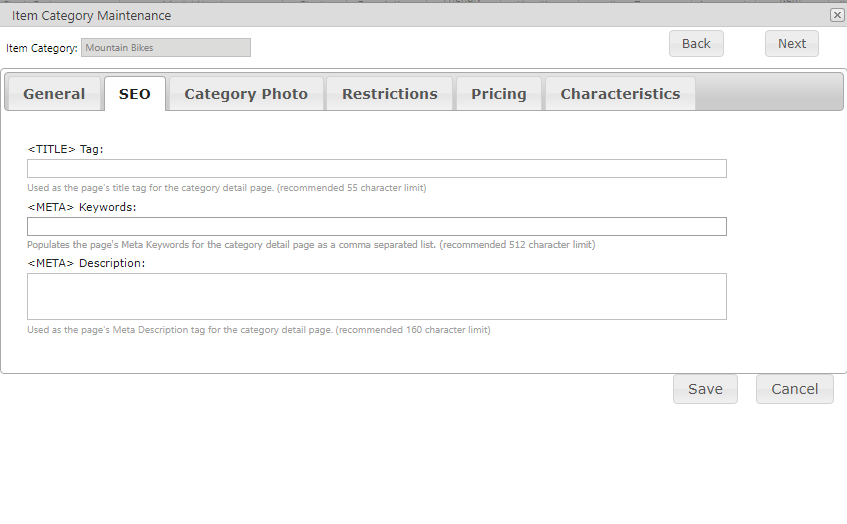
The SEO tab contains the following sections:
| SEO Information | |||||||||||
|---|---|---|---|---|---|---|---|---|---|---|---|
| <TITLE> Tag |
Allows you to specify a desired Category name as seen in the browser's Title bar. This is also how the Category page name appears when listed in Internet Search Engine results. <TITLE> Tags may include the following Replacement Tags to auto-populate dynamic text into your Title from the Category:
|
||||||||||
| <META> Keywords | Allows you to enter important keywords that describe the Category. CyberStore inserts this information in a page's HTML as a <META> Keyword code. They can be included in the default CyberStore list of search fields. Enter keywords as single words or multi-word phrases. To create individual entries, insert a comma or hit the Enter key between each word or phrase. Though input length is unlimited, it is best to limit your entry to 512 characters or less. | ||||||||||
| <META> Description | Allows you to enter a short abstract that describes the Category. Insert this description as a <META> Description code into a page's HTML. It is often included in Internet Search Engine results. Though input length is unlimited, it is best to limit your entry to 160 characters or less. |
Note:
Be sure to click the  button when you are finished making any edits.
Use the Category Phototab to set the main photo to represent that Category.
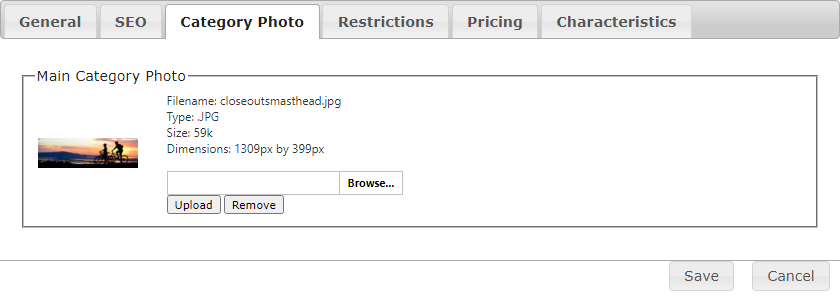
The Category Phototab contains the following section:
| Category Photo Information | |
|---|---|
| Main Category Photo |
To choose a photo, click Browse... and select your desired photo. Then click Upload to finalize your choice. You should then see a preview of this photo within the tab. Details about the filename, file type, file size, and image dimensions should also appear. If you already have a photo uploaded but would like to change it, first click Remove before proceeding to add a new photo. |
Note:
Be sure to click the  button when you are finished making any edits.
Use the Restrictionstab to set shipping restrictions for the entirety of a Category.
There are two subsections within the Restrictions tab. You will automatically be directed to the Shopping Cart tab.
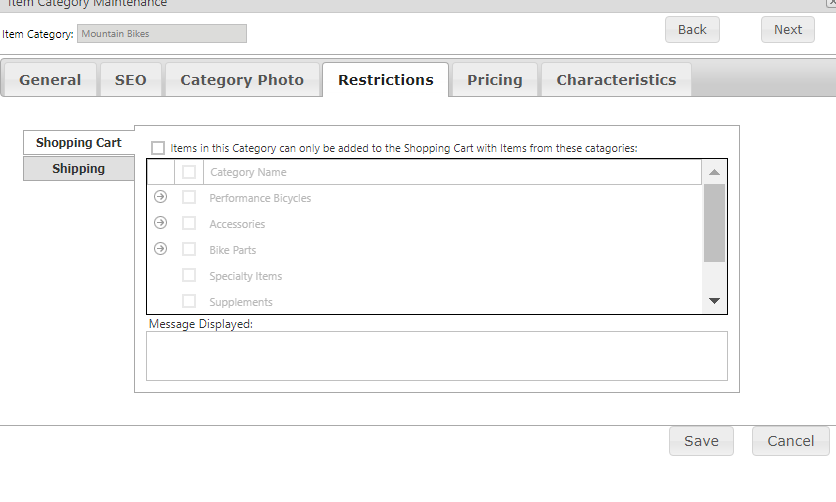
The Shopping Cart tab contains the following sections:
| Shopping Cart Restrictions | |
|---|---|
| "Items in this Category can only be added to the Shopping Cart with Items from these Categories" Checkbox | A box that, when checked, enables the use of Shopping Cart Restrictions for this Category. |
| Category Name | A list that allows you to choose which Categories to which Items must belong in order for the shopper to be able to add these Items to the Shopping Cart. |
| Message Displayed | The message displayed to the user in the Cart when Shopping Cart restrictions are not met. |
You can also navigate to the Shipping tab within this topic.
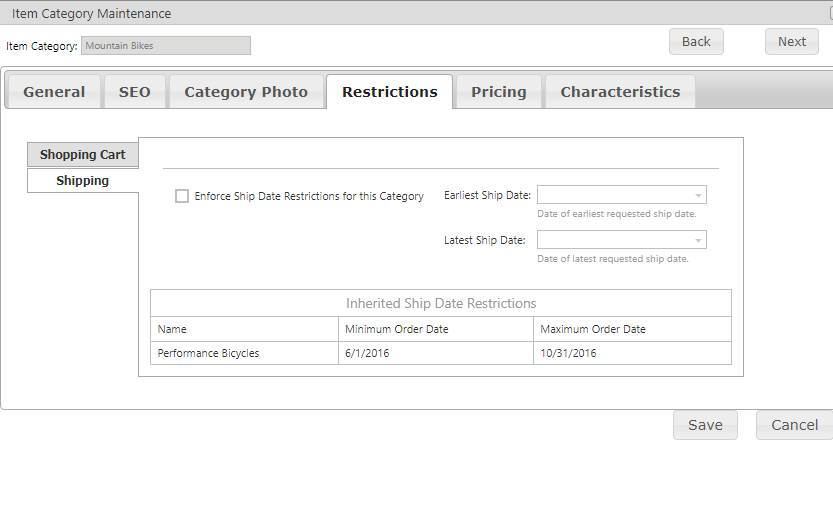
The Shipping tab contains the following sections:
| Shipping Restrictions | |
|---|---|
| Enforce Ship Date Restrictions for this Category | A checkbox that you can select to apply the Earliest and/or Latest Ship Dates that you have identified within this tab to all Items within the Category. This is typically useful for products sold seasonally. |
| Earliest Ship Date | The first possible day that an Item can be shipped out to a shopper. |
| Latest Ship Date | The last possible day that an Item can be shipped out to a shopper. |
Note:
Be sure to click the  button when you are finished making any edits.
Use the Pricingtab (formerly the Discounts Tab) to specify a discount across the entire Category.
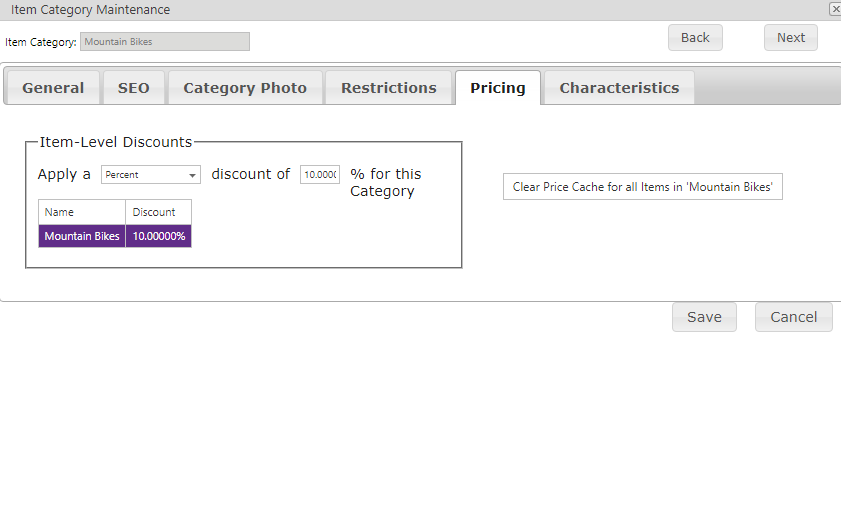
The Pricing tab contains the following sections:
| Pricing Information | |
|---|---|
| Discounts |
Fields that allow you to add a custom discount by a specified amount or percentage that affects all Items within the Category. Note: Category discounts reduce the prices of all Items in the Category above and beyond any pricing derived from SYSPRO. |
| Clear Price Cache |
The Clear Price Cache for all Items in .... button will remove all cached pricing for all Items in the selected Category for all Customers. Prices will then be re-cached per your site configuration as they are browsed on the front end of the site by your shoppers. When clicking the button a drop-down will present the user with choose to either clear the pricing cache only from the selected Category or from the selected Category and all of its sub-categories.
|
Note:
Be sure to click the  button when you are finished making any edits.
Use the Characteristicstab to maintain values of Category Characteristics.
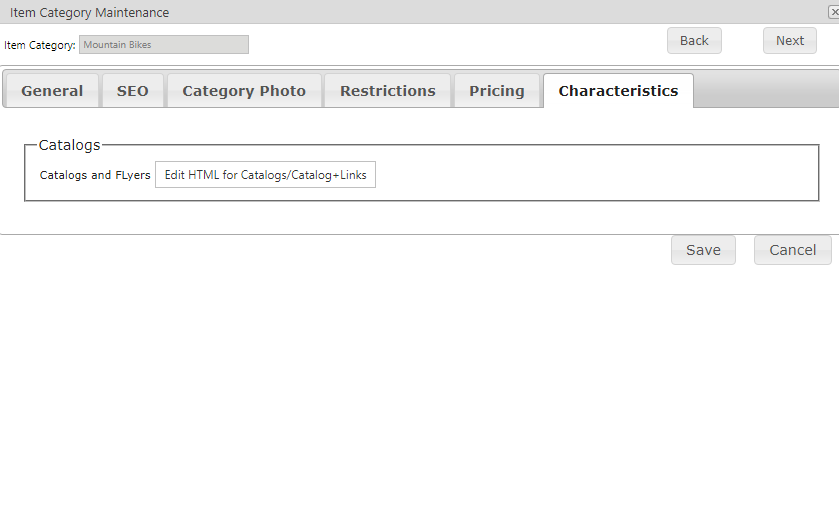
The Characteristicstab contains the any Characteristic families that are of a Category type. For information about setting up Characteristics, see the Characteristic Families and Characteristics Grid setup topics.
Note:
Be sure to click the  button when you are finished making any edits.